A chef knife PO does not fail in one loud way. It slips into claims through 0.5 mm edge waves, bevels that drift side to side, handle gaps, burrs left on the grinding line, crooked logos, weak cartons, or mixed SKU labels the buyer flags before the warehouse does. This is the wrong question to ask: "Did the sample look good?" The real check is whether every knife can pass the same gauge, the same checklist, and the same pack-out count on the day we ship.
At TANGFORGE in Yangjiang, Zhejiang, China, we treat final inspection like production work, because it is. The factory was set up in 2008, runs about 240 employees, and ships roughly 180,000 kitchen and outdoor knives a month depending on model mix. QC pulled the sample, checked edge alignment with a gauge, and caught the carton print typo before loading. For importers and QA teams, the math only works when you set measurable checks before mass production, lock in AQL 2.5 or tighter when the program needs it, and block defects before they leave the gate.
Start With Defect Classification
A solid knife QC check starts before the first carton is opened. We write the defect classification first: critical, major, minor. The inspector needs that sheet on the table, not a verbal guess. We run batches from 3,000 to 20,000 pieces for Europe and North America, and a loose definition will turn a clean lot into a dispute fast.
For chef knives, critical defects are safety or legal problems. Cracked blades, loose handles, exposed sharp edges outside the sheath or box, rust, wrong food-contact material, missing warning labels where required, or barcode errors that stop retail receiving all belong here. QC pulled the sample on a recent 8-inch run and found a chipped tip with a loose sheath fit. One critical defect is usually enough to hold the shipment. This is the wrong question to ask if the carton is already sealed.
Major defects are the issues that make the knife hard to sell or use. A bent blade, off-center edge, loose bolster, handle gap over 0.2 mm, heavy grinding mark, uneven satin line, poor rivet seating, chipped edge, wrong HRC, or the wrong SKU in the carton all fall in this group. We check these with a caliper, angle gauge, and a simple go/no-go block at the grinding line. Treat them under AQL 2.5 unless the buyer manual says otherwise. The math does not work any other way.
Minor defects are small appearance issues that do not affect normal use. Light polishing haze, a tiny handle color shift, or a logo position move under 0.5 mm may stay minor if the approved sample allows it. Keep the focus on function. Do not let a cosmetic scratch hide a real edge problem, but do not reject a hand-finished batch just because every knife shows a slightly different satin trace under the inspection light.
At TANGFORGE in Yangjiang, Zhejiang, we ask buyers to sign off on a golden sample and a defect list before bulk production. That sample sets the line for edge finish, handle color, logo depth, packaging, and carton labeling. We also keep the box code and inner tray spec beside the sample on the QC desk. It saves 2 days of back-and-forth after packing, and we have seen that go sideways when a buyer flags a PO typo only after the pallets are wrapped.
Check Blade Geometry and Edge Alignment
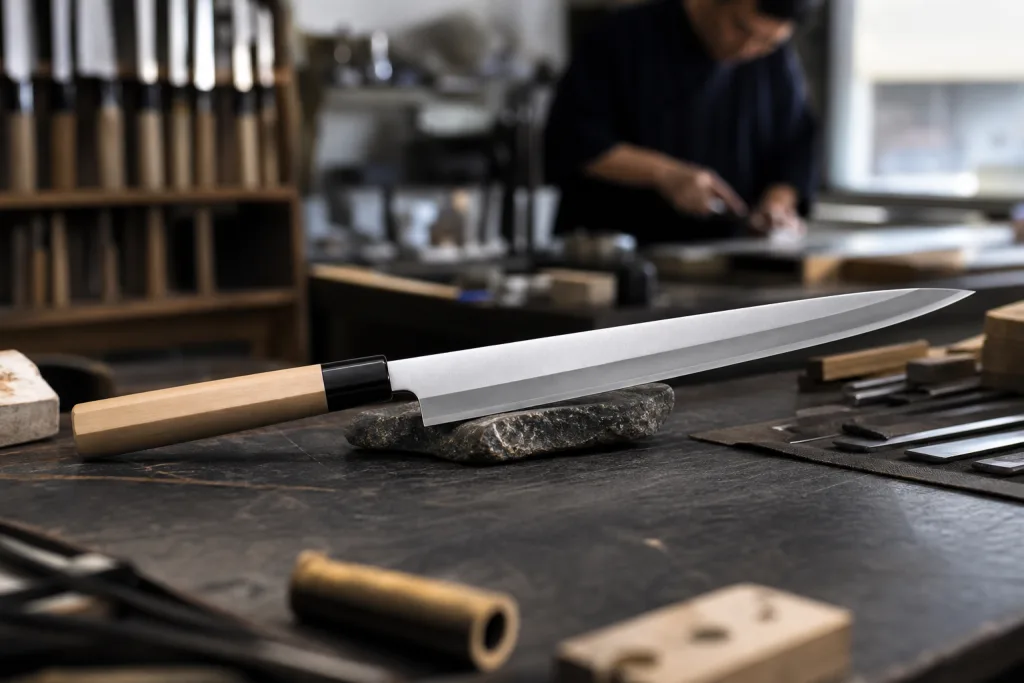
Blade geometry is the first functional checkpoint we run on chef knives before finish QC. A knife can look clean in a catalog photo and still cut poorly if the blade has torsion from heat treat, the edge line drifts off the grinding line, or the tip sits off center by 1 mm. Buyers struggle to name it. They usually write “knife feels crooked” on the claim sheet.
Inspectors should check blade straightness by sighting from the spine toward the tip under a 6000K white light at the QC table. For most 8 inch chef knives, a visible lateral bend over 0.5 mm should be treated as a major defect. For premium lines, use 0.3 mm. The edge should sit on the designed centerline unless the product is intentionally single-bevel. If the bevel pulls hard to one side, the knife will steer in carrots, and the math does not work no matter how sharp the edge tests on paper.
Edge alignment is not sharpness. A knife can shave receipt paper and still have a wavy or over-ground edge from a tired belt on the sharpening station. Run a visual check from heel to tip, then mark flat spots, recurve near the heel, blue over-burned sections, and bevel width jumps with a red QC sticker. A typical Western chef knife may use a 15-18 degree per side edge. Japanese-style OEM orders may request 12-15 degrees per side, but only if the steel and HRC support it.
Tip symmetry matters because buyers see it before they cut anything. Check the final 20 mm of the blade against the approved sample, and use a 10X loupe if the swedge line looks soft. A tip that leans left or right, has an uneven swedge, or has a rounded point should be recorded. Catch it after sharpening. Not after 36 cartons have been sealed for pack-out.
A practical final inspection checklist for blade geometry should include these points, and QC should record the result on the lot sheet before the knives move to wiping and sleeve packing:
- Blade straightness: target under 0.5 mm visual deviation for standard chef knives, checked from spine to tip under white light.
- Edge centerline: no obvious pull to left or right when viewed from tip, unless the PO calls for single-bevel.
- Bevel consistency: no sudden width change over 0.3-0.5 mm unless design requires it, especially near the heel after belt grinding.
- Tip shape: centered, sharp, with the same profile as the approved sample on the QC board.
- Heel finish: no unsharpened thick section unless specified for safety, and no burr left for the pack-out team to find.
Verify Sharpness Without Guesswork
On 6 of the last 10 chef knife inspections we reviewed, the checklist still showed only “paper cut OK.” Fast, yes. Enough? No. A fresh burr can slice paper for 60 seconds, then roll after 7 days in a home kitchen. For serious chef knife quality control, we run visual edge inspection under a 10x loupe, burr removal checks, and a fixed cutting standard on the QC bench. For premium projects, add CATRA or BESS testing during product validation, not just when QC pulled the sample at final inspection.
Sharpness starts before the sharpening wheel. Steel, heat treatment, edge angle, grinding belt sequence, and deburring all change the result. For common chef knife steels such as 1.4116, 5Cr15MoV, X50CrMoV15, 9Cr18MoV, AUS-10, VG-10, and Damascus-clad cores, confirm the target HRC band before you approve the edge spec. A 1.4116 chef knife at 55-57 HRC should not carry the same edge promise as a VG-10 core at 60-62 HRC; the math does not work, and we have seen buyers flag this after the first restaurant trial.
During inspection, check burr by drawing the edge lightly across a cotton pad or soft paper towel. If fibers catch 2 or 3 times on the same side, the burr is still there. Do not run fingers along the edge. Unsafe and sloppy. A 3-cut paper test works as a shop-floor screen, but lock the paper weight and cutting direction on the WI sheet. Loose 70 gsm printer paper will not read the same as receipt paper, and the grinding line will chase a false problem for half a day.
For production orders, we recommend these 3 sharpness control levels, based on price point and complaint risk:
| Control level | Typical use | Factory check |
|---|---|---|
| Standard retail | Entry to mid-range chef knives | Paper cut; burr check with cotton pad; bevel visual under 10x loupe; AQL sampling |
| Premium retail | Higher HRC knives or gift sets with tighter shelf presentation | Paper cut plus periodic BESS sample test; tighter edge visual limit recorded by QC |
| Professional channel | Restaurant supply or culinary school orders with repeat cutting work | Cutting media test; HRC records from heat-treatment batch; edge retention validation before mass production |
The main point is simple: do not overpromise. If you want a 12° per side thin edge, tell the factory the cutting use, blade guard style, drop-test requirement, and complaint threshold before we ship the PP sample. Thin edges sell well on a product page, but they chip fast when steel, HRC, and end-user habits do not match. We have seen this go sideways on a PO where “sushi sharp” was typed into the remarks for a general 8 inch chef knife.
Control Finish, Logos, and Handles
Cosmetic finish is where importers lose 3-5 days, because the signed sample and the PO say “satin” but not what satin means. On the grinding line we mark the golden sample with belt grit, brushing direction, and a 30 cm light-check photo. Satin, mirror, black coating, Damascus etching, and hammered texture need measurable reference points. “Premium finish” and “clean polishing” are not inspection standards.
For satin blades, define the brushing direction and the line variation you will accept, such as no cross scratch over 3 mm visible at 30 cm under normal light. A vertical scratch across a horizontal satin finish is a major defect if QC pulled the sample under the packing table lamp and saw it without tilting the blade. For mirror polish, slight haze can pass as minor, but pitting, wave marks, or deep buffing scratches should be major. For Damascus chef knives, check etching contrast, core alignment against the edge centerline, and acid residue around the heel. Any brown rust color on arrival should be treated seriously, especially for EU and North American buyers.
Logo inspection should be practical. Measure position from the spine, heel, or handle junction with a digital caliper, not from a curved visual guess. A laser logo shift of under 0.5 mm is often acceptable on standard knives. A 1.5 mm shift on a boxed gift knife looks cheap; we had one buyer flag it before opening the inner carton. If your brand uses blade logo and handle end-cap logo, inspect both positions. Crooked logo orientation is easier to notice than a small position shift.
Handles need more attention than they get. Check the tang-to-scale gap with a 0.10 mm feeler gauge, then run a thumb over proud rivets, sunken rivets, cracks, rough edges, glue overflow, and color mismatch. For full tang chef knives, a tang step over 0.15-0.2 mm can feel sharp in the hand. For pakkawood, G10, ABS, PP, walnut, or micarta handles, ask for material declarations when your market requires REACH, LFGB, or FDA-related documentation.
One pushback from the factory side: approving a handle only from a rendering is the wrong question to ask. A handle can look correct in CAD and still feel too square, slippery, or tail-heavy after the final sanding wheel touches it. Before mass production in China, approve a physical pre-production sample with actual handle sanding and final coating; we ship 2-3 pcs by courier so the buyer can hold the knife, not just sign a PDF.
Inspect Heat Treatment and Materials
Heat treatment stays invisible until the complaints start. On the grinding line, QC can pull a sample and still miss a bad temper if nobody set a clear HRC window. Too soft, and the edge rolls fast. Too hard, and we see microchips or a broken tip. Same root cause: no controlled HRC spec.
Your purchase order should spell out the steel grade and the target HRC band. For German-style stainless chef knives, 55-58 HRC is common. For higher carbon stainless such as 9Cr18MoV, AUS-10, or VG-10 core Damascus, 58-62 HRC is common depending on geometry. Chasing the top number is the wrong question. A 62 HRC thin chef knife sounds good on paper, but if the edge angle is too aggressive, the buyer will flag chips on the first carton check.
In factory inspection, HRC testing should happen before final polishing when possible, because Rockwell testing leaves a small mark. For finished goods, test retained samples or hidden areas when the design allows. We run batch records by furnace load and date, then tie them to shipment lots. That trace trail matters more to importers than a photo of the HRC tester sitting on the bench.
Material verification also covers handle materials, adhesives, coatings, blade oil, and packaging that touches the knife. EU buyers should check REACH and LFGB requirements. US buyers may ask for FDA food-contact statements depending on the sales channel. If your retailer needs BSCI, ISO 9001, or social compliance paperwork, ask for it before deposit, not when the container is already booked. We once saw a buyer reject an EVA tray after it sat 12 days in a hot warehouse and picked up odor.
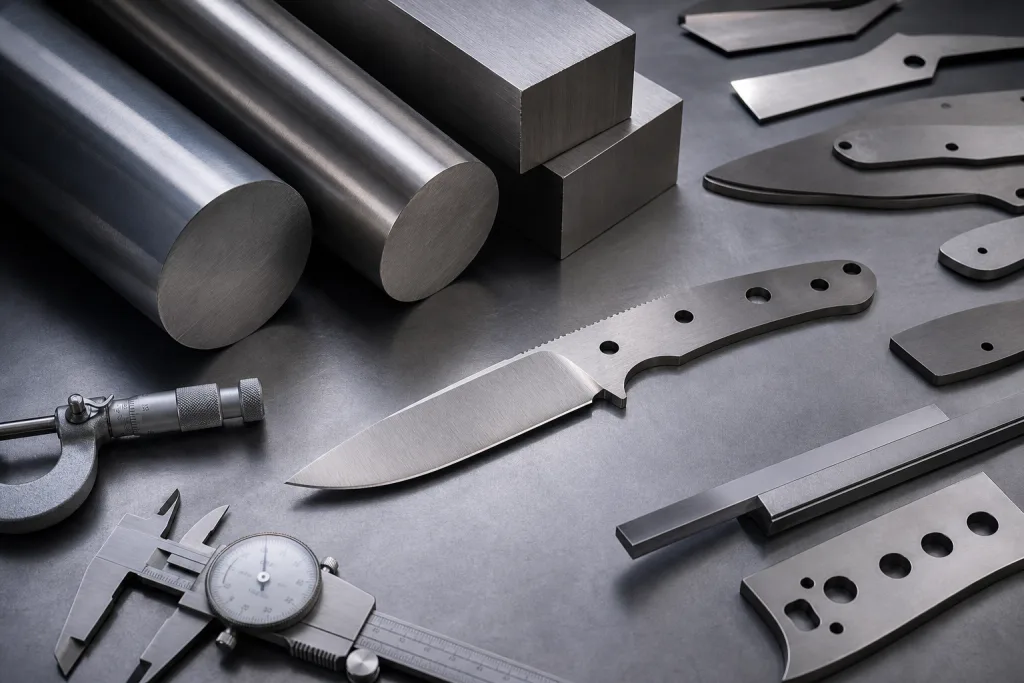
A serious knife QC inspection should compare the production knife against the approved BOM. Wrong steel substitutions are not common in a disciplined factory, but confusion happens when a buyer uses similar SKUs at different price points. We have seen a PO typo turn 430 into 420, and that one digit changes the whole job. The BOM should list steel, thickness, HRC band, handle material, rivet material, surface finish, logo method, sheath or blade guard, inner box, master carton, and barcode format.
Build the Final Inspection Checklist
A final inspection checklist has to match the sales channel. A chef knife sold on Amazon needs the barcode, FNSKU, user manual, warning card, and carton protection checked at the packing table. A bulk knife for hotel supply needs a different pack-out check. Same blade, different job. Our label printer and handheld scanner catch the mismatch before the carton gets taped.
Most importers use a third-party inspector before shipment. Fine. A generic consumer-goods checklist misses knife problems. The inspector should open cartons, scan codes, remove knives from the tray, check the edge guard, inspect the heel and tip, then repack the set the way we ship it. A knife with no tip guard can pass a visual check and still land with 4 percent damaged tips after ocean freight. We've seen that go sideways on the grinding line.
For standard chef knife orders, we check these points on the packing bench:
- Quantity: order quantity, carton count, inner pack count, and SKU split all match the packing list and loading plan.
- Blade: straightness on a flat table, edge alignment, sharpness, burr, tip, heel, and satin or mirror finish.
- Handle: gaps at the bolster, rivet lift, cracks near the tang, sanding marks, coating evenness, balance point, and logo position.
- Safety: edge guard fitted, warning label in place, no exposed sharp point in the retail pack.
- Labeling: EAN, UPC, FNSKU, country of origin, SKU, carton mark, and retailer label all scan clean.
- Packaging: box crush, insert fit, desiccant if required, master carton strength, and tape seal hold.
For sampling, AQL 2.5 for major defects and AQL 4.0 for minor defects is a common baseline. Some retailers want AQL 1.5 for major defects or zero tolerance for critical defects. On a 500-piece order, the inspection fee per knife looks high, but one wrong barcode or a PO typo costs more once the carton is on the pallet. QC pulled the sample at the pallet line and caught a barcode mismatch before export. That is the real math.
At TANGFORGE, MOQ changes with construction and pack-out. A simple private-label chef knife can start around 600 pieces per SKU. Fully custom forged knives, new molds, or gift sets usually start at 1,000-2,000 pieces. Normal lead time is 45-60 days after sample approval and deposit. Once the die-cut insert changes, we rerun the fit check, and the schedule slips fast if the buyer asks for a new mold and a tiny MOQ.
Pack-Out Must Survive Freight
Pack-out is not warehouse cleanup. It is product quality. We have seen a 60 HRC chef knife pass edge and finish QC, then come back as a claim because the tip punched through a 0.8 mm insert wall during a 12-carton drop test. A perfect blade still loses money if the guard slips off, the inner box polishes a black POM handle, or the master carton caves in under pallet load. Packaging made only for catalog photos is the wrong question to ask.
For retail chef knives, shake the closed box for 10 seconds and check that the blade cannot move. A molded pulp tray, PET tray, EVA insert, or paperboard locking insert must lock the handle and blade in two contact points, not just cradle the handle. If the tip points into a weak corner, add a PP tip guard or change the insert drawing before mass pack-out. For wood boxes, QC should pull 5 samples and check hinge screws with a small Phillips driver, magnet pull, surface scratches, and blade-to-lid contact after vibration; we once found a lid rubbing the spine because the foam pad was 1.5 mm too thin.
Outer cartons should be sized tight enough to stop box travel, with enough clearance to prevent pressure marks. The math does not work when a 24-piece carton has 18 mm of empty space on one side. For export shipments from Yangjiang, Zhejiang or other China manufacturing zones, cartons face truck loading, container humidity, port stacking, and inland delivery before your warehouse sees them. We run 5-ply cartons for heavier knife sets, and for gift boxes we add L-shaped edge protectors when the buyer allows the extra 0.06 USD per set.
Barcode control matters as much as carton strength. Inspectors should scan actual retail labels with a handheld scanner, not read the digits by eye. For marketplace shipments, FNSKU labels must match the selling unit, not the master carton. For DDP shipments to Amazon-style fulfillment centers, one wrong label can trigger rework fees that beat the inspection cost; we have seen this go sideways from a PO typo where “8 inch chef knife” and “8 inch carving knife” shared the same carton mark.
Ask for pack-out photos before sealing mass production cartons. The photo set should show open retail box, knife position, blade protection, user manual, silica gel if used, barcode, inner carton, master carton marks, pallet marks if applicable, and loaded container condition. QC pulled the sample should be the rule here, not the packer’s best-looking box. Photos do not replace AQL inspection, but they catch simple mistakes 2 days earlier, before 300 cartons are taped and stacked at the loading door.
Frequently asked questions
The most common chef knife defects are not dramatic blade breaks. They are edge and finish problems that hurt sell-through: off-center edge, uneven bevel width, burr left after sharpening, bent tip, handle gap, proud rivet, scratched satin finish, weak blade guard, wrong barcode, and mixed SKU carton. In our factory checks, a practical tolerance for visible blade bend is usually under 0.5 mm for standard 8 inch chef knives and under 0.3 mm for premium lines. Handle gaps over 0.2 mm should normally be major defects because customers can feel them. Packaging defects also matter. If 2-4 percent of knives arrive with damaged tips because the insert is loose, the blade quality was wasted.
For most chef knife orders, use zero tolerance for critical defects, AQL 2.5 for major defects, and AQL 4.0 for minor defects. Critical defects include unsafe packaging, cracked blades, rust, incorrect food-contact material, or labels that block legal sale. Major defects include bent blades, chipped edges, wrong HRC, loose handles, wrong logo, or wrong SKU. Minor defects include small cosmetic variation that does not affect sale or use. Some retail chains require AQL 1.5 for major defects, especially for branded gift sets or higher price points. Do not choose AQL only by habit. A 600 piece order and a 20,000 piece order may need different inspection intensity because the commercial risk is different.
Use more than one method. A paper-cut test is useful, but it can miss burrs and weak edges. Define the paper type, cutting direction, and minimum pass rate so every inspector uses the same method. Add a burr check with cotton pad or soft paper towel; if fibers catch repeatedly, deburring is poor. For premium knives, use periodic BESS testing or CATRA validation during product development. Also check edge angle and HRC together. For example, a 1.4116 knife at 55-57 HRC should not be judged against the same edge-retention claim as a VG-10 core knife at 60-62 HRC. Sharpness without proper heat treatment is only a short-term result.
A good final inspection checklist should cover quantity, workmanship, function, safety, labeling, and pack-out. For the blade, inspect straightness, edge alignment, bevel consistency, burr, tip shape, heel finish, surface scratches, rust, and logo position. For the handle, check gaps, cracks, rivets, sanding, coating, and balance. For safety, confirm edge guards, warning labels, and no exposed sharp tip in the retail box. For pack-out, scan UPC, EAN, or FNSKU labels, check inner and master carton marks, confirm SKU split, and inspect carton sealing. Add photos of open packaging and carton marks. Without pack-out checks, a technically good knife can still fail warehouse receiving.
For repeat orders with stable materials, pre-shipment inspection may be enough if the factory has proven records. For new OEM chef knives, new steel, new handle material, new packaging, or first orders over 1,000 pieces, use both inline and final inspection. Inline inspection should happen after grinding, heat treatment, handle assembly, and before full pack-out. This catches edge alignment, HRC, handle fit, and finish problems while rework is still possible. Final inspection then confirms AQL result, labeling, packaging, and carton quantity. If you wait until all goods are sealed, reworking 3,000 knives can add 7-14 days and may miss the vessel booking.
Send Your Chef Knife QC Requirements
Share your drawings, golden sample photos, AQL level, target HRC, packaging brief, and shipment plan. Our Yangjiang, China team will review manufacturability and inspection points.
Request a Quote