A blade logo looks simple on a quotation sheet. On the grinding line, it turns into a production variable. One logo choice can affect the satin finish, salt-spray result, carton label artwork, scrap rate, copper mold cost, and whether your brand still looks clean after 6 months of kitchen prep or outdoor use. QC pulled one 2.0 mm chef knife sample last month because the logo edge bled after passivation; the inspector circled it with a red pen before the batch moved to packing.
At TANGFORGE in Yangjiang, Zhejiang, China, we see the same buyer mistake on about 3 RFQs out of 10: picking the cheapest logo process before checking steel grade, blade finish, retail price, and warranty risk. Wrong question. We run about 240 employees and ship OEM/ODM knives for global importers, so the right answer is not always the cleanest pre-production sample from the laser room. The method has to survive your use case at the right MOQ and lead time, even after the buyer flagged a 1-letter typo on the PO artwork and asked us to rework 300 blade proofs before mass production.
Which logo method should you choose first?
For a first OEM knife program, choose laser marking unless there is a clear reason to avoid it. This is the answer we give after 40+ new private-label projects each year. Fiber laser covers most stainless steels, carbon steels, Damascus cladding, and titanium-coated blades, so the first trial does not need a copper die or screen plate. No die charge. Faster sampling. On our 30W fiber laser, a 28 mm logo on a satin 5Cr15 blade usually takes under 20 seconds, and the mark holds when power, speed, and focus are set correctly on the blade fixture.
The wrong question is which method looks best on a sample. Ask what happens after sharpening, dishwashing, cutting lemon or tomato, 200 alcohol wipes, and 8 months in a retail warehouse at 35°C. QC pulled one sample last season where the logo looked clean in the light box, but after 200 alcohol wipes the buyer flagged the left edge fading by about 0.3 mm. A blade etching knife sample can still fail if the mark is too shallow, too dark for the finish, or placed where the thumb rubs it daily. We see this on 2 mm chef blades near the pinch grip.
For mid-range kitchen knives, we usually run fiber laser on satin or stonewashed blades because cycle time stays stable and the grinding line does not need extra masking tape. For premium chef knives, deep laser engraving or controlled electrochemical etching gives a more permanent look, especially on VG-10 or 60-62 HRC blades where the buyer wants the mark to feel built into the steel. For high-volume budget knives, printed knife branding works when the order is for a promotional set or gift item and the buyer accepts lower abrasion resistance. The math does not work if they expect print pricing with engraving durability. For traditional forged knives, a stamped knife logo can look authentic, but the die mark must be planned before final finishing, usually before we run the blade through the last belt stage.
At our Yangjiang, Zhejiang facility in China, a normal private-label knife order runs 35-55 days after sample approval, with the logo method locked before mass production. Changing the logo process after pre-production samples is not a small edit. We have seen this go sideways: one PO had a 32 mm logo approved, then the buyer changed it to 45 mm after packaging artwork was done. That change added polishing checks, new blade rejection criteria, and a carton label revision before we could ship; QC also had to reset the AQL photo standard for the 45 mm mark.
How the Top 5 methods rank
For procurement, I rank blade logos by dishwasher wear, repeatability on a 500 pc run, reject cost after final inspection, and MOQ room by SKU. Catalog beauty is the wrong question to ask first. Last month QC pulled 40 blades from the grinding line and found 3 logo halos at the heel; on a 300 pcs/SKU order, that already eats margin. Looks good, ships badly. A sharp mark that creates 8% cosmetic rejects is a bad mark, and a cheap mark that fades after 20 detergent wipes is not value.
| Method | Best use case | Typical MOQ | Typical cost impact | Durability |
|---|---|---|---|---|
| Fiber laser marking | Most OEM stainless blades and black-coated blades, with logo position held within ±0.2 mm on the laser jig | 300-500 pcs/SKU | USD 0.04-0.18/pc | Good to strong |
| Deep laser engraving | Premium chef knives or hunting blades in 58-60 HRC steel, where the buyer wants a cut-in mark you can feel with a fingernail | 300-500 pcs/SKU | USD 0.12-0.45/pc | Strong |
| Electrochemical etching | Flat satin blades and classic chef knives, as long as the stencil sits clean on a 2.0 mm blade face | 500-1000 pcs/SKU | USD 0.06-0.20/pc plus screen | Good |
| Stamped logo | Forged or traditional blades, where die depth matches spine thickness and we check the first heat batch before mass run | 1000+ pcs/SKU | USD 80-250 tooling plus low unit cost | Excellent if done correctly |
| Pad or screen printing | Gift sets or budget retail packs with color logos, checked by 3M tape test before packing | 500-1000 pcs/SKU | USD 0.03-0.12/pc | Fair to weak |
My ranking for most importers is blunt: laser marking first, deep engraving for premium lines, stamping when the knife style needs that old forged look, electrochemical etching for a classic dark mark on flat stainless. Printing comes last unless color or shelf price beats wear resistance. We run fiber laser jobs in about 12 days vs 18 days for a new stamped-logo order with tooling approval, so the math does not work for small seasonal SKUs. One buyer flagged this on a PO: logo method written as “laser print,” artwork showing a stamped depression. We stopped it before sampling.
Exceptions still matter. On a mirror-polished blade, a black laser mark can show micro-burn halos if the operator skips alcohol cleaning after polishing compound; QC sees it under a 6500K inspection lamp. On a powder-coated outdoor blade, laser marking exposes base metal, so we do a 24-hour salt spray check before we ship. Damascus is different. The logo should not fight the pattern. We have seen this go sideways: a 28 mm dark logo covered the best part of the layer line, so the buyer asked us to remake the sample with a 14 mm cleaner mark.
What affects durability in real use?
Logo durability is decided before the logo machine is switched on. We check the blade spec first: steel grade, hardness, belt finish, coating build, mark depth, and logo position. On our bench that means Rockwell tester reading first, then vernier caliper on blade thickness and logo location. A 58-60 HRC chef knife with a #400 satin belt mark does not behave like a 54-56 HRC stamped utility knife; a 60-62 HRC powder steel pocket blade is another case again. Hard blades take a clean laser line. Push the laser power too far and QC will feel a burr at the mark edge or see a yellow heat stain about 0.2 mm wide. Ask for the setting sheet.
The common failures look small on the table. Grey laser marks turn pale after wiping, printed logos scratch during carton friction, etched logos come back patchy after passivation, and stamped marks can pack with green polishing compound from the buffing wheel. We have seen buyers approve 20 bright samples, then the buyer flagged the first 5,000 pieces because the logo faded after the grinding line stacked blades in PE sleeves. This is the wrong question to ask: "Will the logo stay forever?" Ask what it survives.
Use this checklist before approving a logo sample:
- Cleaning test: wipe the mark 50 times with a wet cloth and 20 times with 75% alcohol. QC pulled the sample after the alcohol wipe, not before.
- Abrasion test: rub with a dry cotton cloth for 100 cycles and inspect under normal retail lighting, about 600-800 lux on our QC bench. No studio light tricks.
- Dishwasher warning: if your packaging implies dishwasher use, test it. 8 out of 10 premium kitchen programs we ship should not print that claim, and buyers push back on this until the logo turns cloudy.
- Salt exposure: for outdoor knives, use a 24-hour salt spray screen before mass production, then check the logo edge with a 10x loupe. We run this before packing, because rust creep at the mark edge is painful to argue about later.
- Position check: keep logo tolerance at +/-0.5 mm for chef knives and +/-0.8 mm for large outdoor blades. A 1 mm drift looks obvious once the blade sits in a clamshell or gift box insert.
For kitchen knives sold into Europe, REACH and LFGB concerns usually sit with food-contact materials and coatings, not the laser mark itself. For the United States, FDA food-contact expectations still matter if inks, coatings, or colored fills sit near the cutting surface; we once saw a PO typo put a colored fill 6 mm closer to the edge than the approved drawing. If you choose printed knife branding, ask for the ink system name and compliance documents before the 1,200 pcs MOQ sample run. The math does not work after packing.
When is a stamped knife logo worth it?
A stamped knife logo makes sense on a forged chef knife, a rustic cleaver, or a heritage SKU where the buyer wants a mark you can feel with a fingernail. On thin flat blades, this is the wrong question to ask. Stamping moves steel. On a 1.5 mm slicer, the press can leave a small wave beside the logo, then the grinding line has to chase that spot during final satin finish. For blades below about 1.8 mm spine thickness, we check the CAD profile, measure the blank with a digital caliper, and pull 1 trial piece before we accept the stamped logo request.
Timing decides the result. We run stamping before heat treatment, or before final grinding and polishing, while the steel still has some give. Ask for stamping after blades are hardened to 56-60 HRC and we have seen cracked marks plus soft logo edges under the 10x loupe. Bad idea. A clean stamp needs a matched die, a press set with repeatable depth, and enough pieces to cover tooling without making the PO look silly.
Typical die cost is USD 80-250 depending on size, depth, and logo detail. After tooling, unit cost can sit under USD 0.03/pc in volume, but the real cost shows up at the polishing wheel. Fine text under 1.2 mm height often loses shape, and thin logo lines can close when the worker buffs the blade with a cotton wheel and green compound. Big marks on narrow blades look heavy. The buyer flagged this on a 20 mm paring knife once; after 600 pcs needed re-polishing, the math did not work.
Buyers like stamping because it feels permanent. Factories slow down because the stamp changes blade geometry, especially near the bevel shoulder or on a narrow spine. If your MOQ is 300 pcs/SKU, laser is the smarter call. If your annual demand is 10,000 pcs for one forged chef knife, stamping can pay back. In China production, the lowest unit price is not always the lowest project risk; QC pulled the sample, measured a 0.3 mm logo-side bend with a feeler gauge on the inspection table, and packing stopped.
Can printed branding ever be acceptable?
Yes, printed branding can pass, if the buyer accepts the trade-off. Pad printing suits a small one-color logo on a budget blade; screen printing fits a wider mark, for example 35 mm across the flat; UV printing is the safer choice when the artwork needs a clean color edge. Shelf appeal first. We run these on promotional sets and low-cost retail knives, usually 2.0 mm stamped blades coming off the grinding line, with the logo checked against a Pantone card before packing. I would not choose print for a serious chef knife or hunting knife that will be washed, oiled, sharpened, and knocked around. The math doesn't work.
Printed knife branding sits on top of the blade surface. Abrasion is the weak point. QC can rub it off with a white cotton cloth if the ink cure is poor; we have seen black ink smear after 10 dry rubs when the oven temperature was set 8°C low. A clear coat improves service life on some SKUs, but the buyer still needs to check food-contact approval, yellowing after storage, and gloss mismatch under a 6000K inspection lamp. On mirror blades, printing can look sharp. On stonewashed or bead-blasted blades, adhesion is less stable unless the blade is degreased with alcohol and tested before mass production.
Printing is usually chosen because the logo has 3 or 4 colors, and that is fair for gift sets or licensed promo orders. The procurement trap is setup. Every added color means another screen or plate, tighter registration, and more QC time on the line. A two-color logo with 0.2 mm misalignment already looks cheap on a 200 mm blade; the buyer sees it before they check the steel grade. Change the logo to one solid color if you can. Hairline text and soft gradients go sideways on steel more than buyers expect, especially after the first trial run on the blade fixture.
For B2B orders, we normally suggest printed branding only when MOQ is at least 500-1000 pcs/SKU and the buyer signs off on abrasion limits. Put the standard in the purchase order, not just in a chat message. Use a line like this: no visible peeling after 50 dry rub cycles and no major color loss after 20 alcohol wipes. QC pulled the sample, the buyer flagged it, then nobody could point to a written limit; we have seen this argument turn into an AQL dispute too fast. One PO even called the mark “etching” while the artwork file said “UV print.” That typo cost 12 days.
What should your artwork file include?
Logo artwork should be boring and exact. Send vector files in AI, EPS, SVG, or PDF format, with fonts outlined before we open the job folder. A PNG copied from a website will not cut cleanly for laser marking or die making; our operator can see the saw-tooth edge on the 30W fiber laser preview at 0.2 mm zoom before the buyer sees the sample. If the mark has a required size, write the width in mm. Do not write “same as photo.”
For chef knives, common logo widths are 18-32 mm depending on blade height. On pocket knives and tactical blades, 8-18 mm is more common. Scale matters. A logo that looks balanced on a 210 mm chef knife can look too big on a 75 mm folding blade; we had one buyer flag a sample because the mark sat 2 mm too close to the thumb stud. If you have multiple SKUs, check each logo size against the blade drawing instead of forcing one size across the range. The math doesn't work.
Your artwork approval checklist should match the job sheet our marking room uses. We tape one printed copy beside the laser fixture, and QC checks the first 5 pcs with a caliper before the operator keeps running.
- Logo file in vector format, with all fonts outlined.
- Logo width and height in mm, not percentage.
- Exact placement from heel, spine, or centerline, with a blade drawing if available.
- Color or darkness reference for laser, etching, or printing; one buyer approved “black” but expected light gray laser oxide.
- Allowed tolerance, normally +/-0.5 mm for premium kitchen knives.
- Confirm whether the same logo also appears on handle, sheath, box, manual, barcode label, or FNSKU sticker.
For Amazon or retail-ready shipments, blade logo approval must match packaging approval. We have seen buyers approve a blade mark, then find the box insert and FNSKU label using different brand names or capitalization; one PO had “ProKnife” on the blade and “Pro Knives” on the carton mark. QC pulled the sample set before packing. This causes customs and warehouse trouble, and it has nothing to do with knife quality.
At TANGFORGE, sample marking usually takes 5-10 days after artwork confirmation. If a new stamping die or special etching screen is needed, add 7-15 days. For urgent orders, laser marking is the safer call because we run it beside the grinding line and do not wait for a die shop slot. We ship faster that way.
How should you inspect blade logos?
Set the logo inspection standard before mass production, not after 42 cartons are taped and parked by the loading door. For most OEM knife orders, we run AQL 2.5 for major cosmetic defects and AQL 4.0 for minor defects, unless your retailer writes a tighter limit into the PO. Treat a missing logo, wrong logo, reversed mark, misalignment over 1.5 mm, peeling print, or unreadable brand name as a major defect. Small shade drift inside the signed range can stay minor; QC pulled 13 samples last month where the laser mark shifted half a tone after blade oiling, and the buyer accepted it.
Inspect the logo the same way the knife will be sold. Check at about 50 cm under normal white light, then move closer only when the inspector sees a suspected defect. Simple rule. If every laser mark is checked with a 10x loupe, you will reject normal process variation that a retail customer will never notice. Go too loose and you can miss a batch where the laser focus drifted after the fixture screw backed off by 0.8 mm.
Ask for a signed golden sample and keep one at the factory and one with your QC team. The sample should use the final blade finish, not a flat test coupon from the sample room. Satin and mirror finishes throw light differently; black oxide, titanium coating, and Damascus make the same mark read darker or lighter by SKU. We have seen this go sideways when a buyer approved a laser coupon, then flagged 2,400 mirror-finish blades because the mark looked too pale under warehouse LEDs.
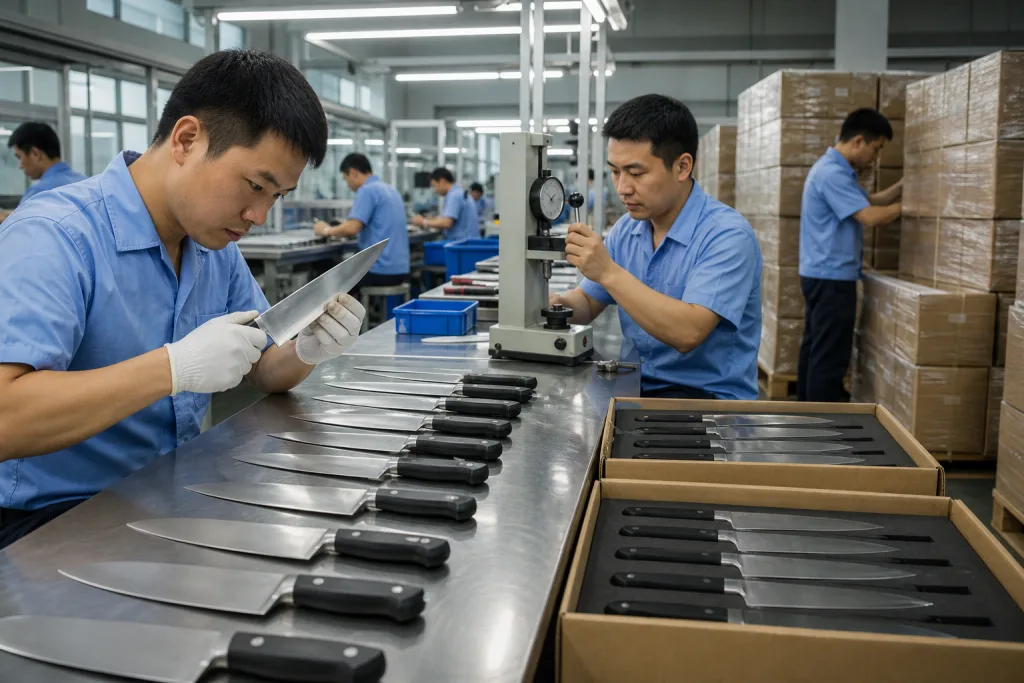
For our China factory production, a practical control plan is direct: first-article approval at line start, hourly operator checks with the logo fixture, final QC sampling by SKU, and carton-level verification against the packing list. TANGFORGE can produce roughly 80,000-120,000 knives per month depending on mix, but logo mistakes still need human eyes. The math does not work if you rely only on automation. Automation holds placement; it does not replace a clear approved standard, especially when the grinding line changes from 2.5 mm chef blades to thinner utility blades in the same shift.
If your brand sits in a premium retail channel, add a pre-shipment inspection with logo-specific photos: close-up blade face with the mark visible, full knife view, carton label, and retail packaging. Ask the inspector to include a ruler in one blade photo so logo position can be checked in mm. This costs less than sorting 3,000 units in a North American warehouse, and we have had buyers flag one PO typo on the retail sleeve before it became a full rework bill.
Frequently asked questions
For most new private-label knife brands, fiber laser marking is the best starting point. It keeps MOQ flexible at about 300-500 pcs/SKU, avoids USD 80-250 stamping die cost, and works on most satin stainless, Damascus, and coated blades. You can approve samples quickly, usually within 5-10 days after vector artwork is confirmed. It is also easier to adjust logo size or position before mass production. If your first order is small and you are still testing the market, do not lock yourself into stamping unless the design truly needs that forged look. Spend the money on better steel, handle fit, and packaging consistency first.
Laser marking can increase corrosion risk if the settings burn too aggressively, remove protective coating, or leave residue on stainless steel. A controlled fiber laser mark on common knife steels such as 3Cr13, 5Cr15MoV, 7Cr17MoV, AUS-8, 14C28N, or D2 is normally safe when the blade is cleaned and passivated correctly. For black-coated tactical knives, the laser often exposes base steel, so we recommend a 24-hour salt spray screen or at least a humidity check before production. On kitchen knives, place the mark away from the cutting edge and avoid deep marking on very thin stock. Ask the factory to test the final blade finish, not a separate metal coupon.
Electrochemical etching can look excellent on flat satin chef blades. It gives a classic dark mark and can feel less industrial than laser. But it is more sensitive to surface preparation, stencil quality, electrolyte control, and operator handling. It usually makes sense from 500-1000 pcs/SKU because screens or stencils need setup. Laser marking is more flexible for mixed SKUs, short runs, and quick revisions. If your logo has fine lines, both methods need testing at the exact final size. For durability, deep laser engraving usually beats standard electrochemical etching, while normal laser and good etching are both acceptable for many mid-range kitchen knives.
You can make a logo very small, but legibility becomes the limit before machine capability. For blade logos, text below 1.0 mm height is risky, especially after satin finishing, stonewashing, or coating. For chef knives, a 18-32 mm wide logo is common. For pocket knives, 8-18 mm is more realistic. If your brand mark includes thin lines, gradients, or small registered symbols, simplify it for steel marking. We prefer to test at 100% final size on the real blade finish. A logo that looks readable on a PDF at 400% zoom may look weak on a 90 mm blade under retail lighting.
Reject the obvious failures as major defects: wrong logo, missing logo, reversed logo, unreadable text, severe misplacement, peeling printed mark, exposed corrosion around the mark, or a logo that does not match the approved golden sample. For normal production, set AQL 2.5 for major logo defects and define minor defects separately, such as slight darkness variation or tiny edge feathering that is not visible at 50 cm. Position tolerance should usually be +/-0.5 mm for premium kitchen knives and +/-0.8 mm for larger outdoor knives. Include close-up photos in the inspection report so disputes are based on evidence, not memory.
Send Your Logo Before Quoting Production
Share blade steel, finish, target MOQ, and vector artwork. We will recommend a marking method with cost, lead time, and inspection limits.
Request a Quote