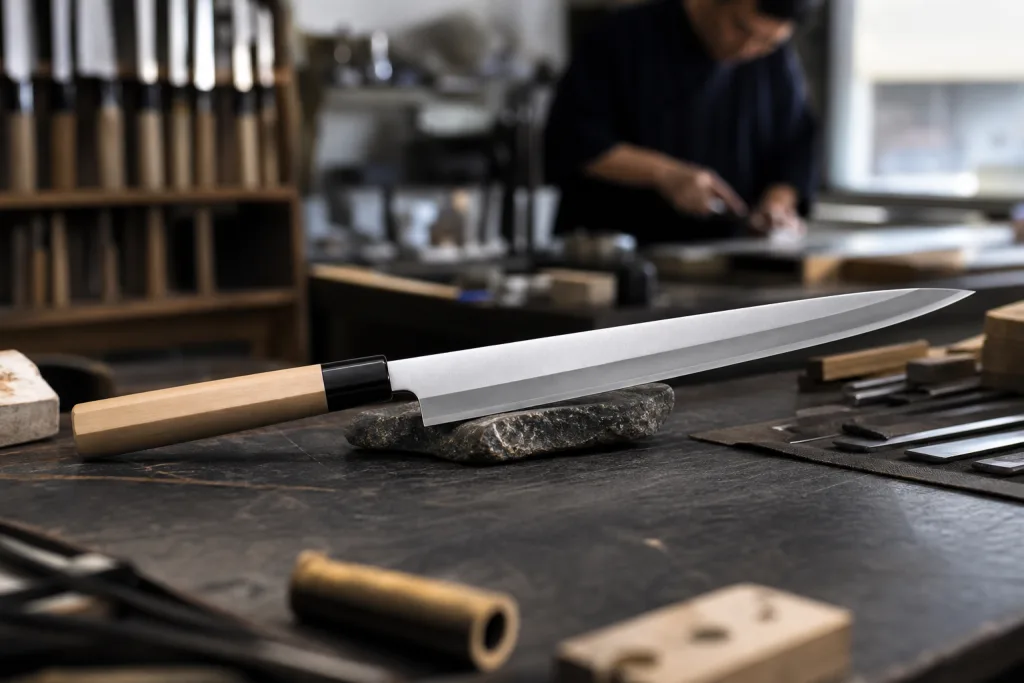
Most OEM knife problems start before we buy steel. A blade profile can look clean in a render, but our shop still has to laser cut it, heat treat it, run it through the grinding line, polish it, inspect it under AQL 2.5, pack it, and do that 3,000 times without turning your margin into scrap.
At TANGFORGE in Yangjiang, Zhejiang, China, we see this every month on kitchen, chef, pocket, hunting, tactical, and Damascus programs. QC pulled a chef knife sample last week where 0.3 mm behind the edge changed the cut feel and added 2 extra grinding passes per blade. That is the wrong place to save drawing time. If you are building a knife spec sheet for a new OEM project, blade geometry is where cutting performance, factory yield, unit cost, and delivery date start fighting each other.
Geometry Is a Cost Decision
Knife blade geometry is design language, but on our floor it is also the routing sheet. Once you fix the blade profile, spine thickness, distal taper, grind type, tip shape, and edge angle, we have already fixed belt passes, jig changes, polishing minutes, QC checkpoints, and scrap allowance. The grinding line feels this first. A 2.2 mm spine with a 15° per side edge runs different from a 3.5 mm outdoor blade, even if the drawing looks clean.
For OEM buyers, the first cost question should be blunt: can we run it on existing tooling, or do we need a new blanking die, CNC program, laser setup, grinding jig, or polishing fixture? A standard 8 inch chef knife profile in 1.4116 or 5Cr15MoV usually fits a stable process with our current press die and magnetic grinding fixture. A tall bunka with a dropped tip, aggressive distal taper, and full convex grind is another story. We have seen buyers ask for that shape at entry-level pricing, and the math does not work once the operator slows down to protect the tip.
At our China factory, a normal stamped kitchen blade program can often move from confirmed drawing to pre-production sample in 12-20 days. That means the DXF is clean, the PO steel grade matches the drawing, and QC pulled the sample without finding handle gap or edge waviness over 0.3 mm. A custom forged bolster, unusual recurve, compound grind, or thick tactical blade can push that to 25-40 days because we need trial grinding, hardness checks, and destructive testing. We run the first batch slower for a reason.
Small geometry calls create hidden cost too. A thin edge sells well in premium kitchen channels, but a 0.25 mm pre-sharpening edge can chip during bulk handling if the tray and tip guard are weak. A high saber grind on a pocket knife looks strong, but it removes more steel and adds belt time on 120 grit before finishing. A deep hollow grind cuts nicely when the wheel diameter is controlled; let the wheel wear too far and QC will flag uneven shoulders. Cheap geometry is not always bad. Expensive geometry is not always better. The correct geometry matches your retail price, warranty policy, and the user who will actually open the box.
Cost Drivers Buyers Usually Miss
The blade outline is the easy line on the drawing. Cost sits in the grind, the tolerance stack, and the parts the buyer cannot see on a PDF. If the spec sheet says “sharp blade, satin finish,” our grinding line has to guess the rest: spine thickness, bevel height, edge angle, satin direction, and burr standard. We have seen this go sideways after a good 2 pcs sample, then QC pulled the first bulk sample and the buyer flagged “same shape, different cutting feel.”
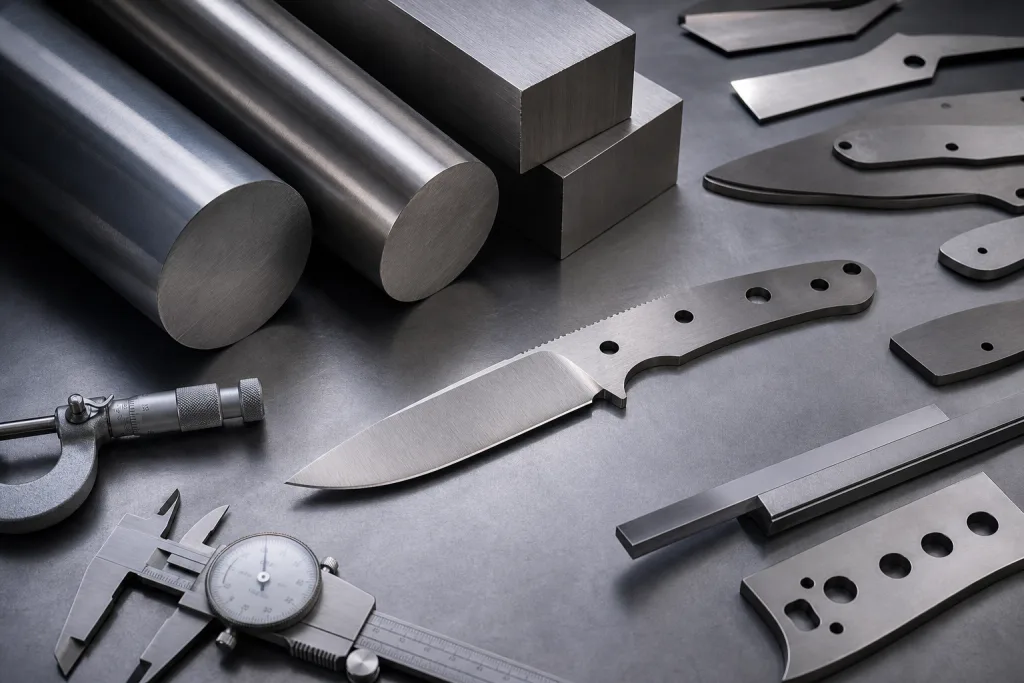
Stock thickness hits the quote first. A 2.0 mm kitchen utility knife and a 3.0 mm outdoor fixed blade may use the same steel grade, but the thicker blade burns more steel, more punching or laser time, tighter heat treatment control, and more belt work on the 240# and 400# stations. Bevel height is the next cost driver. Full flat grind removes more material than low flat grind, so the operator spends more time per blade and we change abrasive belts faster, sometimes after 600 pcs instead of 900 pcs. Edge angle is where some specs get too ambitious. A 15 degree per side edge cuts clean on a chef knife, but it needs stable hardness, usually around 56-60 HRC depending on grade, plus cleaner burr removal under the 10x loupe. Asking for “thin, tough, cheap” is the wrong question to ask.
Finish changes the math. Belt satin is fast, and we run it every day with a fixed grain direction jig. Mirror polish takes more hand work and exposes small waves near the plunge line; one buyer rejected a batch because a 0.3 mm ripple showed under showroom lighting. Stonewash hides pocket and tactical blade scratches, but barrel media, oil ratio, and batch time still need control. Damascus adds billet cost and etching control, then we still have to protect the blade after etch so rust spots do not appear during 18 days on the water.
Here is the quoting view we use for OEM geometry work from Yangjiang, Zhejiang, China, before we cut tooling or book the heat-treatment slot:
| Geometry choice | Typical cost effect | Lead-time effect | Buyer risk |
|---|---|---|---|
| Existing blade profile | No new tooling or low setup fee | 12-20 days sample | Looks close to other catalog SKUs |
| New flat profile | USD 250-600 tooling | Add 7-12 days | DXF and PO drawing must match |
| Compound or recurve profile | USD 500-1,200 tooling | Add 10-20 days | Grinding variance near the curve |
| Full flat or convex grind | 8-18% higher labor | Add 3-8 days in trial | Spine and edge thickness disputes |
| Damascus blade geometry | 30-80% higher blade cost | Add 10-25 days | Etch depth and pattern approval |
MOQ Tiers Change the Sensible Geometry
MOQ is not just a buying rule. It decides which blade geometry makes sense on the factory floor. For a 300 pcs trial run, do not ask for a profile that needs a new blanking die unless the margin pays for the die charge. We run laser blanks on small tests; a dedicated profile die only starts to look sane when the PO moves toward 5,000 pcs, because the tooling cost drops to a few cents per knife instead of sitting like a stone on each unit.
For TANGFORGE OEM programs, practical MOQ starts around 300-500 pcs per SKU for private-label kitchen knives when the buyer accepts our existing blade shapes and standard handle materials. For a new blade profile with a named spine thickness such as 2.2 mm, a fixed grind line on the drawing, etched logo artwork, color box dieline, and barcode labeling checked against the PO, 1,000 pcs per SKU is a more realistic starting point. Pocket, hunting, and tactical knives with nested liners, liner locks, G10 scales cut on CNC, pocket clips, or molded sheath tooling usually need 1,000-2,000 pcs because QC has more parts to match and more places to catch a 0.3 mm misfit.
Low MOQ forces trade-offs. You use laser-cut blanks instead of a dedicated die. Fine for samples and early shelf testing. The catch is unit cost and edge repeatability; the grinding line has to hold the bevel by hand against the jig, and QC pulled one sample last month where the left bevel ran 1.1 mm wider than the right. Medium MOQ lets us tune fixtures and keep repeatability under control. High MOQ pays for go/no-go gauges, packing fixtures sized to the color box, and steadier process control across the batch.
If the knife sits in an entry-level range, do not over-spec geometry that the shopper will not pay for. A reliable 16-18 degree kitchen edge, 2.0-2.5 mm spine, and clean taper will often beat a dramatic grind that adds USD 1.20 to FOB. We have seen buyers flag that number in the quotation meeting, then ask why the retail price no longer fits the supermarket shelf. For premium retail, thinner behind-edge measurement, better balance at the pinch grip, and controlled distal taper can support a higher shelf price when the brand story and packaging do their part.
Our blunt advice: match geometry ambition to order volume. A buyer asking for custom Japanese-style profiles, a special HRC band, custom saya, gift packaging, and 300 pcs total is not building a factory-efficient project. The math does not work. Start with 2 SKUs instead of 6, lock the tolerances on the drawing, and choose geometry that the line can scale without reworking half the first inspection report.
Lead Time Starts at the Drawing
A good knife spec sheet shortens lead time because the grinding line is not guessing from a photo. A weak spec sheet creates 14 emails, 2 extra sample rounds, and arguments when QC pulls the AQL 2.5 report. The clean format is simple: a 2D drawing with dimensions; steel grade and HRC range; spine thickness and thickness 10 mm behind tip; grind type and edge angle; surface finish and logo position; handle material; packaging; compliance requirements such as FDA or LFGB if the market asks for them. We check the first drawing with 0.02 mm calipers against the sample, not against sales talk.
For a standard OEM kitchen knife using an existing blade profile, a realistic timeline is 3-5 days for drawing confirmation, 12-20 days for samples, 3-7 days for buyer review, 30-45 days for mass production after deposit and sample approval, then 7-14 days for inspection, packing, and export handling. Ocean freight to Europe or North America then adds another 25-40 days depending on port and season. Last month one PO showed 210 mm blade length on the drawing and 201 mm in the item table; that typo cost 2 days before we even opened the sample blank.
For a custom outdoor or tactical blade, add time. Thicker stock, special heat treatment, coated blades, sheath fit, lock testing, and custom handle machining do not move through the same lane as a stock chef knife. Sampling can reach 25-40 days, and mass production can run 45-70 days. Damascus and multi-piece gift sets often add another 10-15 days because billet preparation and color-box approval run on separate tracks. We have seen sheath fit go sideways over a 0.3 mm mouth gap, then the buyer asks why packing is not ready.
Lead time also depends on change control. If you approve a 2.5 mm spine and then request 3.0 mm after sampling, we need to restart blank sourcing, adjust grinding, re-check balance on the digital scale, and revise packaging insert slots. If you change the edge angle from 20 degrees per side to 15 degrees after pilot production, you are not just changing sharpness. You are changing durability, warranty exposure, and inspection criteria. The wrong question is “can you just change it?” The math usually does not work after steel has been cut.
The fastest projects are not the simplest-looking knives. They are the projects where the buyer locks decisions early and does not treat the sample stage as open-ended design research. Decide early. Our sample room moves faster when the signed drawing, Pantone logo file, carton mark, and barcode arrive before we run the first 50 pcs trial.
Cutting Performance Has Trade-Offs
Every blade geometry takes something from somewhere else. Thin blades cut with less drag, but we have seen 1.6 mm samples come back with bent tips after frozen chicken testing when the steel and heat treatment were not matched to the job. Thick blades feel safe in the hand, but they wedge in squash and carrots, then the buyer flags the slicing video. A pointed tip is good for trimming silver skin and detail cuts; it also gets damaged first in a 1.2 m drop check. A rounded tip is better for hotel buffets or kids’ kitchen lines, but it gives up control. That is the trade.
For chef knives, we run the spec from spine thickness, distal taper, blade height, edge angle, and thickness behind the edge. The caliper matters. A common mass-market 8 inch chef knife may use a 2.0-2.5 mm spine and 15-18 degrees per side, with around 0.35-0.45 mm behind the edge before final sharpening. A harder premium blade at 59-61 HRC can carry a thinner edge, but only when the steel grade, tempering curve, and blade sleeve protect the edge in transit. QC pulled one sample last season where the edge was fine, but the blister pack let the tip hit the inner wall during carton vibration. For German-style kitchen knives, buyers often prefer tougher geometry and 56-58 HRC. For Japanese-style positioning, buyers accept a harder and thinner blade, but the end user needs clear care instructions. Otherwise the math does not work.
Outdoor knives are a different job. A hunting or tactical blade may use 3.0-5.0 mm stock, 20-25 degrees per side, and a stronger tip with more meat near the point. That geometry will not slice tomatoes like a chef knife, so do not sell it that way. We have seen this go sideways when a PO called a 4.5 mm survival knife “kitchen sharp” and the retailer expected paper-thin vegetable cuts. Pocket knives sit between both ends. EDC buyers want clean cutting through cardboard and rope, but they still expect the tip and edge to survive pocket carry, zip ties, and the wrong user prying open a paint lid.
Performance testing should match the product. CATRA testing can compare edge retention, but one CATRA score does not tell the full sales story. Paper slicing and tomato cutting are quick checks on the grinding line, though two operators can score the same blade differently. Rope cutting, cardboard cycles, tip drop checks, and 24-hour salt spray or vinegar wipe tests give better commercial feedback for outdoor and EDC programs. For food-contact products, REACH, LFGB, or FDA-related material declarations may also be required by your importer or retailer; we usually confirm that before sample dispatch, not after the buyer asks for it on day 18.
Inspection Must Match the Spec
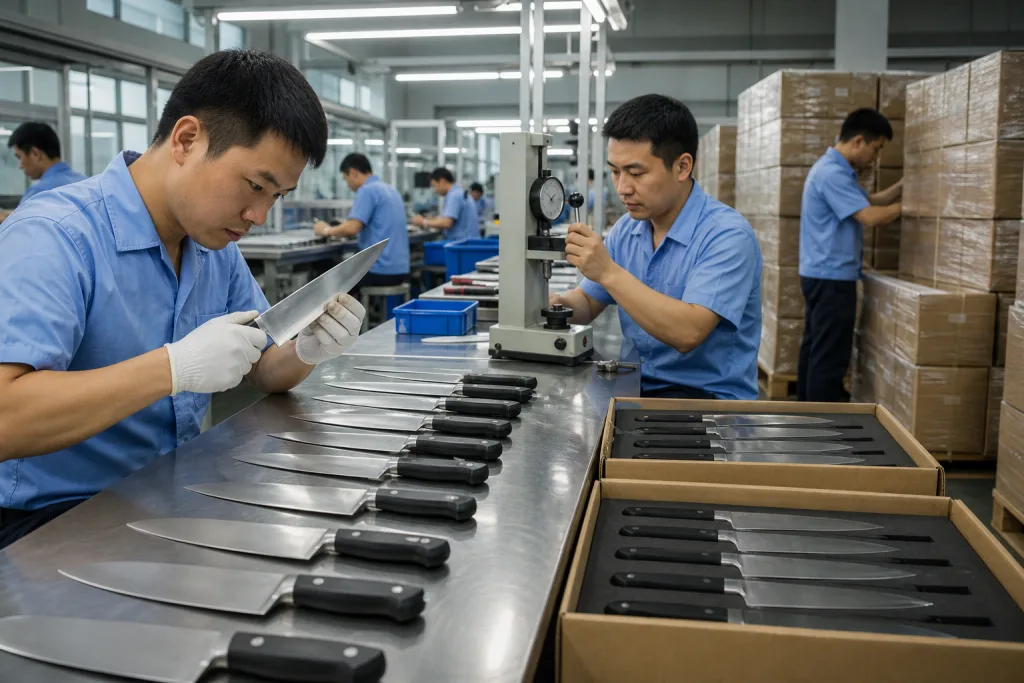
Inspection works only when the blade geometry can be measured with a caliper, angle gauge, or warpage fixture. “Feels sharp” is not an acceptance standard; we reject that wording on OEM spec sheets. Before mass production, lock the critical dimensions and tolerances in the drawing. If you skip this step, QC may hold 800 knives the grinding line says are fine, or pass a batch your customer returns after opening 20 cartons.
For kitchen knives, we run checks such as overall blade length ±1.0 mm, blade height ±0.5 mm, spine thickness ±0.15 mm, edge angle tolerance ±2 degrees per side, visible burr not allowed, blade warpage limit such as ≤1.5 mm over full length, plus handle-to-blade alignment checked on a flat glass plate. For outdoor knives, add tip symmetry, grind height variation measured at both sides, coating adhesion after tape pull, sheath retention, and lock function where applicable. QC pulled one sample last month where the left grind sat 1.8 mm higher than the right. The buyer flagged it before packing.
AQL 2.5 is a common general inspection level for major defects, with critical defects at 0 tolerance. Classify a cracked blade, loose handle, failed lock, exposed sharp burr on handle, or wrong steel grade as critical, because the math does not work once those reach retail shelves. Uneven satin lines can be major for a gift-box channel, while a small packaging rub mark may pass for a bulk promo order. We have seen this go sideways when the PO says “premium finish” but the approved sample shows normal 400 grit satin.
Hardness is where buyers need to be practical. Asking for 60 HRC exactly is the wrong question to ask; production needs a band, such as 58-60 HRC for a kitchen knife or 56-58 HRC for a tougher outdoor knife, depending on steel. Ask for heat treatment records and random Rockwell checks from each batch. We usually test 5 pieces after tempering with the Rockwell C tester, then mark the readings on the batch card. For steel verification, XRF or material certificates work, but the purchase order must state the requirement before production, not after the container is booked.
At TANGFORGE, our monthly capacity is about 500,000 knives across kitchen, outdoor, pocket, and Damascus lines. That volume only helps when specs stay stable. Tight geometry tolerances are possible, but they need to be priced, tooled, and inspected as real manufacturing requirements. We ship cleaner when the drawing says 2.5 mm spine at heel instead of “strong blade,” and when the PO does not hide a typo like 15° total angle when the buyer meant 15° per side.
Market Positioning Decides What to Specify
The right geometry starts with the sales channel. For a hospitality distributor, we usually spec a tougher blade because hotel kitchens care about 3 re-sharpening cycles and repeat orders, not a paper-thin Instagram cut. Retail cutlery is different: the buyer checks the blade profile under store lighting, and a cleaner factory edge often decides the first review. Corporate gift sets need safe handling, a consistent satin line, and cartons that stop the edge from cutting through the insert. QC pulled a 210 mm chef sample last month where the edge looked good, but the tip punched the PET tray. Bad fit.
For entry-level kitchenware, keep the geometry robust and easy to repeat: a proven blade profile, 56-58 HRC stainless steel, 16-20 degrees per side, a satin finish the grinding line can hold, and edge protection that survives a 1.2 m carton drop test. For mid-range retail, spend the money on a cleaner grind and better handle balance before paying for decorative pins. For premium positioning, specify behind-edge thickness in mm, a tighter polishing standard, better steel, controlled distal taper, and a cutting test your sales team can defend. Pretty Damascus with a fat edge is the wrong question to ask.
Pocket and outdoor knives need their own geometry. A hunting knife needs edge stability in bone contact and corrosion resistance after wet cleaning; we check handle grip with water on the G10 scales. A tactical knife needs stronger tip geometry, coating thickness that does not jam the sheath, and a destination-market compliance review. An EDC knife needs smooth pocket carry and repeatable lock performance; our QC jig checks lock play after 300 open-close cycles. Do not borrow a hunting grind for an EDC SKU and expect clean returns data.
If you are new to OEM development, use a short spec hierarchy. Lock the blade profile and steel first. Then choose thickness and grind. Set edge angle and HRC band next. Finish, logo, packaging, and inspection come after that. This order saves money: we have seen a PO say “2.5 mm spine” while the drawing showed 3.0 mm, and the sample room lost 4 days waiting for the buyer to confirm which number was real.
Yangjiang, Zhejiang, and wider China knife manufacturing gives you dozens of choices, but choices are not a sourcing plan. A clear knife blade geometry brief lets us quote honestly, cut the first sample in 12 days instead of 18 days, and build to the price tier instead of fighting it on the grinding line. If the brief only says “sharp and premium,” the math does not work.
Frequently asked questions
Include a 2D blade drawing with overall length, cutting edge length, blade height, spine thickness, tip thickness, grind type, grind height, edge angle, steel grade, HRC band, finish, logo location, and inspection tolerances. For kitchen knives, also specify thickness behind the edge if cutting performance is important; 0.25-0.45 mm is common depending on price tier and steel. For outdoor knives, add tip geometry, coating, sheath fit, and edge durability tests. Do not only send a photo or retail sample. A photo helps communicate style, but it does not control production. A proper knife spec sheet usually saves 7-14 days of back-and-forth during OEM sampling.
A simple new flat blade profile usually adds USD 250-600 for tooling, laser programming, or fixtures, depending on size and process. More complex profiles, recurves, thick tactical blades, or forged bolsters can add USD 500-1,200 before mass production. Unit cost impact depends on MOQ. At 300 pcs, a USD 600 setup adds USD 2.00 per knife before any material or labor increase. At 3,000 pcs, it adds USD 0.20 per knife. This is why we often suggest using existing geometry for market tests and reserving full custom geometry for confirmed programs of 1,000 pcs per SKU or higher.
For kitchen chef knives, 14-18 degrees per side is common. Softer stainless around 56-58 HRC usually performs better at 16-20 degrees per side, while harder steels around 59-61 HRC can support a thinner edge if the user understands maintenance. For hunting, tactical, and heavier outdoor knives, 20-25 degrees per side is safer because the edge sees more impact, twisting, and dirty materials. Pocket knives often sit around 18-22 degrees per side. Avoid specifying only total included angle unless your factory uses the same convention. Write “degrees per side” clearly in the spec to prevent mistakes.
No. Thinner geometry usually improves slicing, especially in kitchen knives, but it can reduce toughness and increase damage during shipping, dishwashing, or misuse. A premium chef knife may benefit from a thin behind-edge measurement and 15 degrees per side, but a hospitality knife used by many cooks may need a more durable 18-20 degrees per side edge. Outdoor knives need even more strength at the tip and edge. The right choice depends on market positioning, warranty expectations, steel grade, HRC band, and user education. If your retail channel has high return sensitivity, slightly tougher geometry is often the cheaper long-term decision.
For an existing blade profile with normal stainless steel and standard handle material, sample lead time is usually 12-20 days after drawing confirmation. A new blade profile typically adds 7-15 days for tooling, fixture, or CNC setup. Complex outdoor blades, Damascus blades, coatings, custom bolsters, or sheath development can push sampling to 25-40 days. Mass production usually takes 30-45 days for standard kitchen knives and 45-70 days for more complex pocket, hunting, tactical, or gift set programs. Buyer feedback time matters too. If sample comments arrive in fragments over 2 weeks, the schedule moves with them.
Send Your Blade Geometry Brief
Share your drawing, target price, MOQ, steel, HRC band, and market channel. We will review manufacturability, quote options, and flag geometry risks before sampling.
Request a Quote