On a quotation sheet, knife grinding looks like five neat words: flat grind, hollow grind, convex grind, satin finish, mirror polish. On the grinding line, one change can move the edge from 0.35 mm to 0.55 mm behind edge, add 40 seconds per blade on a 400-grit belt, or push rejects past AQL 2.5 because the bevel shoulder runs uneven after heat treat. Small words. Real cost.
At TANGFORGE in Yangjiang, Zhejiang, China, we see the same sourcing mistake 3 or 4 times a month: the buyer approves a clean sample, then the PO only says “same as sample” with no thickness behind edge, bevel height, grit sequence, HRC band, or inspection method. QC pulled one chef knife sample last quarter where the bevel height was 1.8 mm off between left and right sides; the buyer flagged it only after logo etching, when the math no longer worked. Our factory has about 240 employees and handles OEM/ODM kitchen, chef, pocket, hunting, tactical, and Damascus knives. For most custom knife grinding process orders, MOQ starts around 300-1,000 pcs per SKU depending on blade size, steel, and finish complexity.
Why grinding controls knife value
For a buyer, grinding is not decoration. It sets cutting feel, edge life, sharpening work, food release, return rate, and whether your “professional” claim survives a real kitchen shift. Heat treatment gives the blade 58-60 HRC or whatever the spec calls for; the grinding line decides how that hardness touches tomato skin, rope, carton board, or bone. QC pulled a chef knife sample last month that passed hardness, but the edge felt dead because the bevel was too thick behind the edge.
A chef knife with 58-60 HRC and 0.25 mm thickness behind edge cuts nothing like the same steel at 0.55 mm behind edge. That 0.30 mm gap is where value disappears. A tactical knife at 59 HRC with an aggressive hollow grind can look sharp on the table, then chip when the user pries sideways. Wrong grind for the job. A pocket knife with an off-center grind looks cheap even when the handle, clip, and packaging are correct; we once had a buyer flag a 0.8 mm tip-center drift before he even opened the color box.
In an OEM factory, grinding also controls cost. Each extra pass means belt wear, operator time, heat-control risk, and scrap from blue burn near the edge. We run 240 grit, 400 grit, then hand sanding when the finish calls for it; mirror polish is not “make it shiny.” It can add sanding from 400 to 800 to 1200 grit, buffing, ultrasonic cleaning, and extra QC for waves or cloudy patches under a LED inspection lamp. Damascus blades need tighter control because grinding depth changes pattern balance before etching, and we have seen this go sideways on 300 pcs when the left side was ground deeper than the right.
If you are sourcing from a knife grinding process factory China supplier, the wrong question is “can you grind it?” Ask how they define the grind. The answer should include measurable points, not just nice photos: thickness behind edge, bevel height, tip symmetry, flatness, and finish grit. At TANGFORGE in Yangjiang, Zhejiang, we prefer to confirm a technical drawing, golden sample, and 3-5 control dimensions before quoting mass production. That avoids the common argument where the supplier says “same as sample” and the buyer says “not sharp enough”; we have had POs where “0.35 mm” was typed as “0.53 mm,” and catching that before mass grinding saves both sides money.
Grinding types buyers should specify
Knife categories need their own grinding logic. Do not copy a kitchen knife grind onto a hunting knife just because the counter sample cuts A4 paper cleanly. That is the wrong test. Last month QC pulled 12 blades from the grinding line: all passed paper, but 4 chipped after 30 rope cuts and 2 wedged badly in dry pine.
Flat grind works well for chef knives, utility knives, and outdoor blades where the buyer wants stable production. We run it often because the bevel height is easy to check with a 150 mm digital caliper, and the inspector can catch left-right drift before packing. A full flat grind slices well, but the spine area needs control or you get visual waves under satin light. A partial flat grind leaves more steel behind the edge and usually saves 0.6 to 1.2 minutes per blade on the belt.
Hollow grind uses a wheel to cut a concave bevel. It gives a sharp bite and a clean bevel line, which is why buyers ask for it on pocket knives, razors, and tactical patterns. The risk is repeatability. A 250 mm wheel, blade angle, and hand pressure all change the geometry. For OEM repeat orders, we need a fixture, bevel height tolerance such as ±0.5 mm, and a signed sample. Without that, the second PO goes sideways.
Convex grind puts more support behind the edge, so it suits chopping knives, hunting knives, and outdoor models that see impact. Simple calipers do not tell the full story here. We normally ask buyers to approve 3 to 5 samples, then lock the test method: 50 rope cuts, wood shaving, or edge damage check after chopping a 30 mm dry branch. The math does not work if the buyer wants convex strength but also asks for a thin tomato-slicer feel.
Scandi grind is common on bushcraft knives. The wide single bevel is easy for end users to sharpen, but it shows symmetry mistakes fast. On satin finish, a 0.4 mm bevel-height mismatch is visible under the inspection lamp, and the buyer will flag it before asking about hardness.
For a custom knife grinding process, define the grind type by drawing and dimension. Basic callouts should include blade stock thickness in mm, bevel height, primary bevel angle, secondary edge angle if used, plunge line position, finish direction, and visual tolerance such as “no wave over 0.3 mm across 50 mm.” A PO that says only “sharp edge, satin finish” makes the factory guess, and we have seen that turn into 12 days of sampling instead of 4.
Spec sheet numbers that matter
Keep the grinding spec short, measurable, and tied to how the knife cuts. Brand wording does not help the guy at the 400-grit belt. For most OEM orders we run, the grinding page fits on one A4 sheet if the buyer locks the numbers below instead of sending 6 pages of mood-board copy.
| Spec item | Typical buyer range | Why it matters |
|---|---|---|
| Hardness after heat treat | Kitchen 56-60 HRC, pocket 58-61 HRC | Sets edge retention and how much heat the grinding line can safely take |
| Thickness behind edge | 0.20-0.45 mm kitchen, 0.45-0.80 mm outdoor | Decides cutting feel and chip resistance |
| Final edge angle | 15-18° per side kitchen, 20-25° outdoor | Sets the balance between sharp bite and field durability |
| Finish grit | 240, 400, 600, 800, mirror | Changes appearance, belt time, rework rate, and price |
| Bevel height tolerance | ±0.5 mm to ±1.0 mm | Keeps left and right bevels looking matched in carton inspection |
| Inspection level | AQL 2.5 major, AQL 4.0 minor | Defines what gets accepted, rejected, or sorted before shipment |
Thickness behind edge is the number 7 out of 10 new buyers forget to write down. Measure it before final sharpening, normally 1 mm above the edge line, with a digital caliper that reads 0.01 mm. Too thick, and the knife feels dead even when the apex cuts paper. Too thin, and QC pulled the sample for edge rolling after 20 cuts on manila rope. Asking only for “razor sharp” is the wrong question to ask.
Finish grit needs the same hard agreement. A 400 grit machine satin and a 400 grit hand satin do not look alike under a 6000K inspection lamp. Longitudinal satin on a chef knife needs different handling from vertical belt marks on a tactical blade, and that can add 12 days vs 18 days when the grinding line is full. If your retail photos show clean horizontal lines, say so on the PO. We have seen this go sideways: the mass-production finish passed the spec, but the buyer flagged it because the shelf photo looked different.
MOQ, price, and lead time reality
Knife grinding process MOQ is really about setup risk on our side. If we already have the blade profile in the rack and the buyer accepts our normal satin belt finish, we run it from 300 pcs per SKU. A fresh blade profile needs a new fixture plate and trial pieces on the grinding line, so custom fixtures, Damascus billet sorting, compound grind work, or mirror finish usually starts at 800-1,000 pcs per SKU. Gift sets are a different headache. MOQ is often set by the color box and EVA tray supplier, sometimes 500-1,500 sets, and we have seen a PO typo turn “matte black box” into “black knife” before QC pulled the sample.
Price is the wrong question to ask if the quote only shows steel and handle. Grinding takes labor, belts, rejected blades, and line time. For a mid-range kitchen knife, changing from basic machine satin to controlled hand satin may add USD 0.35-0.90 per piece, because the operator has to keep the scratch direction clean from heel to tip on a 240# or 400# belt. Mirror polish may add USD 0.80-1.80 depending on blade size and rejection standard. For pocket knives, a hollow grind with tight plunge-line matching adds fixture cost and slower hand work, especially below 1,000 pcs, where the math does not spread out.
At our China factory, normal sampling takes 10-20 days after drawing confirmation and material availability. If the 2D drawing gives edge thickness as 0.4 mm but the buyer wants a thinner retail feel, we need one extra trial grind before sending samples. Mass production usually takes 35-60 days after deposit and sample approval. Complex Damascus, coated tactical blades, or private-label packaging can push lead time to 60-75 days. Monthly capacity varies by product mix, but TANGFORGE plans OEM output in the tens of thousands of units per month, not fake unlimited capacity.
Be careful with quotes that ignore grinding difficulty. If two suppliers quote the same steel, same handle, and same package, but one is 18% lower, check the edge thickness, grind symmetry, polishing grit, and whether in-process inspection is written into the quote. We have seen this go sideways: the buyer flagged wavy grind lines only after the carton photos looked fine. Cheap grinding is paid for later through returns, discounting, or brand damage.
QC risks inside mass grinding
The biggest grinding risk is heat. On the grinding line, a worn 80-grit belt can blue the last 0.2 mm of the edge before anyone sees a color change. If the edge overheats during belt grinding, hardness near the edge can drop even when the spine still passes HRC testing. Looks fine. Cuts badly after 20 cartons. We run fresh belts by batch count, use coolant where the steel and finish allow it, take lighter passes, and ask operators to stop when the blade is too hot to hold with bare fingers. QC pulled samples last month that passed 58-60 HRC at the spine but lost bite after rope cutting; that is why we prefer a tight HRC band, such as 58-60 HRC, instead of chasing a hard number that the use case does not need.
Uneven bevels are the next common problem. A left bevel 1.5 mm higher than the right may not affect basic cutting, but the buyer will flag it the minute 12 pieces sit side by side in a retail tray. On knives with a visible plunge line, uneven starts and stops make the product look like a reject, even if the edge angle is within spec. Ask for bevel height tolerance in mm, and require first-piece approval at the start of production. We usually check the first 10 pcs with a digital caliper and angle gauge before the operator opens the full lot, because fixing 10 blades is cheap and reworking 3,000 pcs is not.
Over-thinning is another issue. Some buyers ask for laser-like slicing, then complain when returns show chipped edges after frozen food or bone contact. The right answer is not always thinner; this is the wrong question to ask if the knife is going to home users. For European-style chef knives sold to home users, 0.30-0.45 mm behind edge is often safer than thin Japanese-style geometry. For hunting knives, we ship a stronger edge because a sharpness demo on paper does not pay the claim when the tip chips in the field. The math does not work.
Cosmetic QC matters too. Satin direction and scratch depth should match the approved sample, buffing residue must be wiped from the heel and handle gap, and logos need checking after final grinding because 0.1 mm of extra surface removal can make a laser mark look weak. Rounded tips and coating damage create disputes fast. For final inspection, use AQL 2.5 for major defects and AQL 4.0 for minor cosmetic defects, unless your channel requires stricter rules. Amazon FBA, retail chains, and distributors with chargeback systems often need tighter packaging checks, especially FNSKU scans and carton label verification; we have seen one PO typo in the FNSKU hold 48 cartons at the warehouse.
How to brief an OEM factory
A useful RFQ for knife grinding process OEM work removes guesswork. Send the factory a 2D drawing with blade thickness in mm, target retail price, expected order quantity, preferred steel, hardness, handle material, finish, logo method, packaging, and target market. Tell the supplier whether the knife must comply with LFGB, FDA food-contact expectations, REACH, Prop 65 labeling review, or other importer requirements. We run the grinding line from those details; if the PO says “satin” but the drawing says “mirror,” QC will pull the first sample before bulk work starts.
If you do not have a drawing, send a physical benchmark sample and be honest about what you want copied and what must be changed. “Make it like the photo” is the wrong question to ask for a technical knife. Photos hide 2.0 mm versus 2.5 mm spine thickness, edge angle, distal taper, and surface finish. A solid supplier will ask for caliper readings, Rockwell target, and one sample knife before quoting.
For a new custom knife grinding process, approve two items separately: the pre-production sample and the production control standard. The sample tells the factory what looks and cuts right. The control standard tells QC how to reject or accept mass production under AQL 2.5 or your own checklist. Keep one golden sample at your office and one at the factory. Seal them, label the date, and photograph key dimensions; we have seen this go sideways when a buyer changed the handle radius by 1 mm on WhatsApp but never updated the signed sample tag.
At TANGFORGE in Yangjiang, Zhejiang, China, we usually recommend a pilot order when the design is new, especially for premium chef knives, hunting knives, or Damascus SKUs. A pilot order of 300-500 pcs can reveal grinding time, belt life, packaging scratches, and final inspection yield before you commit to 3,000 pcs. It is less exciting than a big launch. The math works better: 300 pcs with 18% rework hurts, but a full container with uneven 15° edges and blade tips rubbing through inner boxes hurts a lot more.
Supplier checks before placing deposit
Before you pay a deposit, check whether the factory can hold the knife grinding process on a 3,000 pc run, not just on 6 pretty samples. Ask for photos or short video from the rough grinding line, belt rack, fixture table, heat-treatment log, Rockwell tester, edge sharpening bench, and final QC desk. We run 80#, 180#, 400# belts in separate bins; if a supplier cannot show belt storage or jig use because “the boss is not here,” the buyer should slow down.
Ask direct questions. How many operators handle primary grinding, 2 or 12? What belts are used for your finish sequence? How often are belts changed, every 120 blades or only when the operator feels heat marks? Where is hardness tested? Are HRC readings taken before or after grinding? How is thickness behind edge measured, with a 0.01 mm micrometer or by eye? What is the internal rejection rate for similar knives? If the sales answer is only “no problem,” keep asking. We have seen this go sideways when QC pulled the sample and found 0.45 mm behind edge against a 0.30 mm spec.
Audit documents matter, but they are not the blade. ISO 9001-style process control, BSCI or social audit history, material certificates, and food-contact test support help filter suppliers. For kitchen knives, request LFGB or FDA-related material declarations where relevant. For coated tactical knives, discuss adhesion and corrosion testing, then decide whether ASTM-style salt spray targets match your market. One buyer once sent us a PO with “black titanium coating” typed as “black titanic coating”; funny typo, expensive confusion if the coating sample is not signed off.
Match the payment terms to the grinding risk. For repeat OEM orders, 30% deposit and 70% balance before shipment is common. For new molds, custom fixtures, or special packaging, tooling fees usually sit on a separate line. FOB is cleaner for importers with their own forwarder; DDP looks easy, but the math does not work if nobody defines duty, remote delivery, and carton drop-test responsibility. Put grinding specs, approved samples, AQL level, and corrective-action rules inside the purchase order. Not in WeChat. We ship what the PO controls.
Frequently asked questions
For a standard OEM knife with an existing blade profile, normal knife grinding process MOQ is often 300-500 pcs per SKU. If the order needs new tooling, custom fixtures, Damascus pattern control, compound grinding, mirror polishing, or retail packaging, MOQ usually moves to 800-1,000 pcs per SKU. Sets may start at 500 sets because packaging suppliers have their own minimums. At TANGFORGE, we sometimes accept pilot runs around 300 pcs for serious buyers, but the unit price will be higher because setup, sampling, and QC time are spread over fewer knives.
Grinding can change FOB price by USD 0.25-1.80 per knife depending on blade size, steel hardness, finish, and rejection standard. A basic machine satin on a small utility knife is low cost. A chef knife with clean hand satin, thin geometry, and tight bevel symmetry costs more because it needs slower passes and more inspection. Mirror polish and Damascus finishing are higher again. If you compare two quotes, ask both factories to state finish grit, thickness behind edge, edge angle, and AQL level. Otherwise you may not be comparing the same product.
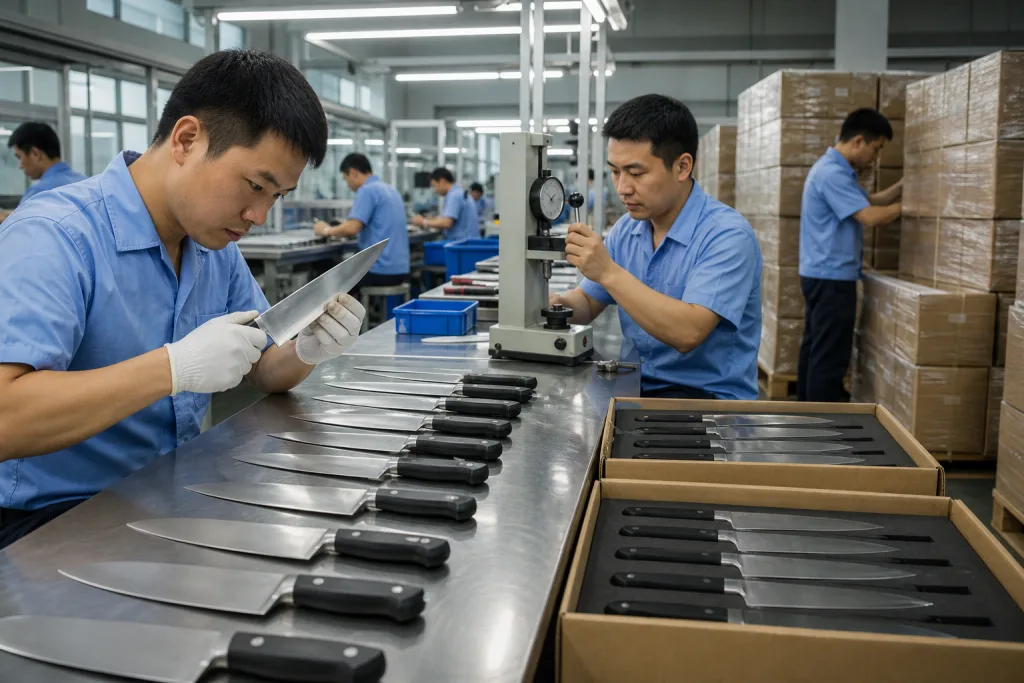
Require first-piece approval, in-process bevel checks every 30-60 minutes, HRC verification by batch, thickness behind edge measurement, final sharpness testing, and cosmetic inspection under defined lighting. For shipment inspection, AQL 2.5 for major defects and AQL 4.0 for minor defects is a practical starting point. Major defects include overheated edges, wrong grind type, chipped tips, loose handles, unsafe burrs, and logo errors. Minor defects include light scratches, small satin inconsistency, or packaging scuffs if they do not affect saleability.
Usually no. Kitchen knives need slicing efficiency, food release, and easy sharpening, so thinner geometry such as 0.25-0.45 mm behind edge and 15-18° per side may be suitable. Outdoor, hunting, and tactical knives need more abuse resistance, so 0.45-0.80 mm behind edge and 20-25° per side is often safer. Steel and HRC also matter. A 60 HRC chef knife and a 58 HRC hunting knife can both be correct if the grind matches the use case.
Approve a golden sample and convert it into measurable production controls. Record blade thickness, bevel height, thickness behind edge, edge angle, finish grit, logo position, weight, and HRC band. Keep one sealed sample with you and one sealed sample at the factory. Put AQL level, defect definitions, packaging requirements, and corrective-action rules on the purchase order. For new designs, use a 300-500 pcs pilot run before a large order. This catches grinding yield problems before you commit to 3,000 or 10,000 pcs.
Send Your Grinding Spec for Review
Share drawings, target MOQ, steel, HRC, finish, and packaging plan. We will flag cost drivers and QC risks before sampling.
Request a Quote