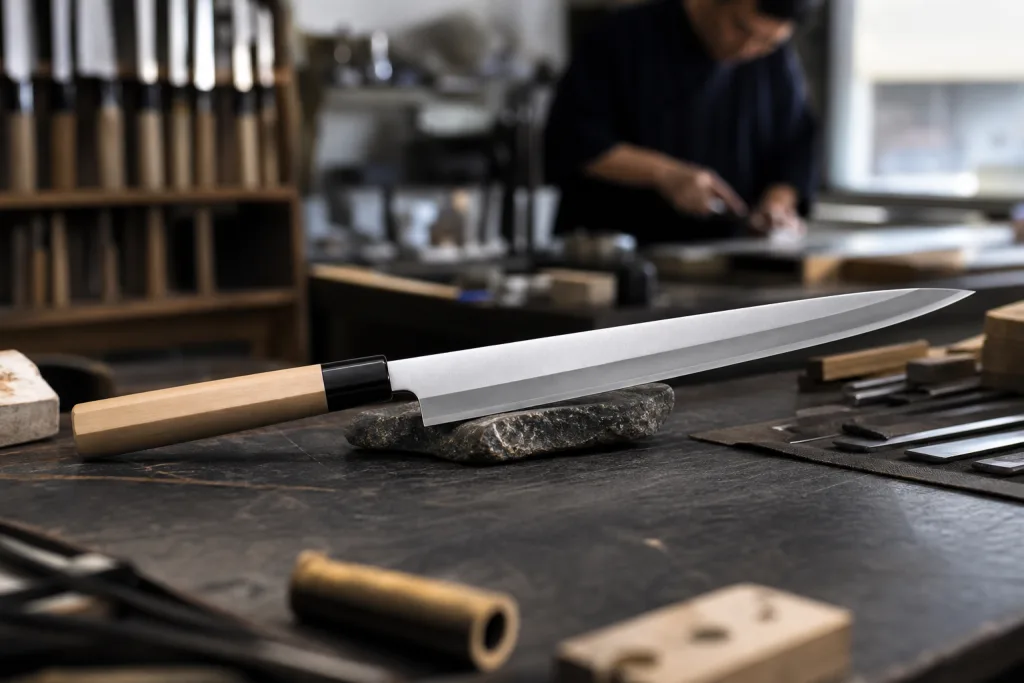
Grinding is where a knife stops being a steel blank and starts acting like a cutting tool. For OEM buyers, this is where 6 sample problems usually show up: bevels out by 0.4 mm, blue heat marks near the edge, wrong thickness behind the edge, left-right symmetry off, belt scratches under a 600-grit satin finish, or a blade that passes WeChat photos but looks bad under a retail light box. QC pulled one chef knife sample last month because the edge measured 0.62 mm behind the bevel when the buyer’s spec said 0.45 mm. That sample was not ready.
At TANGFORGE in Yangjiang, China, we treat sample approval as an engineering gate, not a casual photo sign-off. We run kitchen, chef, pocket, hunting, tactical, and Damascus knife orders for importers and private-label brands, with normal OEM MOQ starting from 500 pieces per SKU and typical sample lead time around 10-18 days depending on tooling and finish. The grinding line checks bevel height with a digital caliper before polishing starts, because fixing a wrong grind after mirror polish is slow and the math doesn’t work. We’ve seen this go sideways when a buyer approves the look but forgets to lock the thickness behind the edge on the PO.
Why grinding approval deserves real specs
About 8 out of 10 first sample approvals we see start with photos, weight, logo position, and carton artwork. That is the wrong checkpoint. The knife grinding process controls cutting feel, edge bite, durability, face appearance, and return risk. QC pulled one 8 inch chef knife last month where the thickness behind the edge was 0.55 mm instead of 0.35 mm; the photo looked fine, but on the cutting board it felt like a wedge.
For OEM work, lock the grinding result before we run samples on the grinding line. Put the numbers on the drawing: blade thickness at spine, thickness 1 mm above the cutting edge, bevel angle per side, grind type, tip geometry, plunge line position, and surface finish direction. If the PO only says “sharp edge” or “nice satin,” the math does not work. Our inspector cannot measure “nice” with a digital caliper.
At our Yangjiang, China factory, a typical 8 inch chef knife in 1.4116 steel may target 55-57 HRC, 2.0 mm spine thickness, 0.35-0.45 mm thickness behind the edge before final sharpening, and 14-16 degrees per side after sharpening. A heavier Western-style chef knife may use 2.5 mm spine thickness with a stronger 17-20 degrees per side edge. Small change. Big feel. We ship both styles, but we do not mix them in the same approval file unless the buyer signs off on two different grind standards.
A good sample approval file needs drawings, tolerance notes, finish reference photos, test requirements, and packaging details. No need for a 30-page engineering book. You need enough detail so a QC inspector holding a bevel gauge and 0.01 mm micrometer can reject a bad piece without arguing about taste. We have seen this go sideways when the buyer approved a sample photo, then flagged the bulk order because the satin lines ran tip-to-heel instead of spine-to-edge.
Grinding types buyers should specify
The custom knife grinding process starts with picking the grind around the job of the blade. A 210 mm chef knife, a 4-inch hunting knife, and a tactical folder should not share one grind note on the PO. We see this mistake about 6 times a year when a buyer copies the chef knife spec into the outdoor line, then QC pulls the sample and the edge feels too thin for field use.
Flat grind is common for chef knives, santoku knives, utility knives, and outdoor fixed blades in the 3.0 mm to 4.5 mm spine range. It gives clean slicing and steady output on the grinding line. Inspection is also simpler: the bevel plane should read straight under a 300 mm steel ruler, with no belly dip near the heel. Hollow grind gives a thinner bite and works well on pocket knives or skinning knives, but it needs tighter wheel control; on a 250 mm wheel, a small hand-pressure change can show as a bright uneven band. Convex grind has better edge support for chopping or bushcraft knives. Simple calipers are the wrong tool for this check. We approve it with a profile gauge, cross-section sample, or a cut piece marked left and right from the same heat lot.
For Damascus knives, grinding is touchier because pattern exposure changes with steel removal. If we grind 0.15 mm too much after etching, the pattern can look washed out. If we leave too much before etching, waves and low spots show up under the acid tank light. For coated tactical knives, the bevel must be clean before coating; black oxide, PVD, or powder coating will not cover bad symmetry. We have seen this go sideways when the buyer flagged a 1 mm bevel-width difference only after the black coating made it easier to see.
Ask your knife grinding process factory China partner to show both the side view and spine view of samples. One photo is not enough. A blade can look fine from the logo side and still carry a twisted tip, uneven distal taper, or a 0.3 mm lean at the point. For folding knives, check blade centering after grinding and sharpening, not before. Material removal changes balance and closure feel, and we run this check with the liner lock assembled because a loose blade blank tells you almost nothing.
Sample data to lock before production
The approved sample should become the golden sample, with numbers the grinding line can copy. If the file only says “same as the sample we liked,” the foreman still has to turn that knife into a routing card, jig setting, and QC checklist. That is where we have seen 6 OEM programs go sideways in one season. QC pulled the sample, measured 0.38 mm behind the edge with a Mitutoyo caliper, and wrote it on the sample tag.
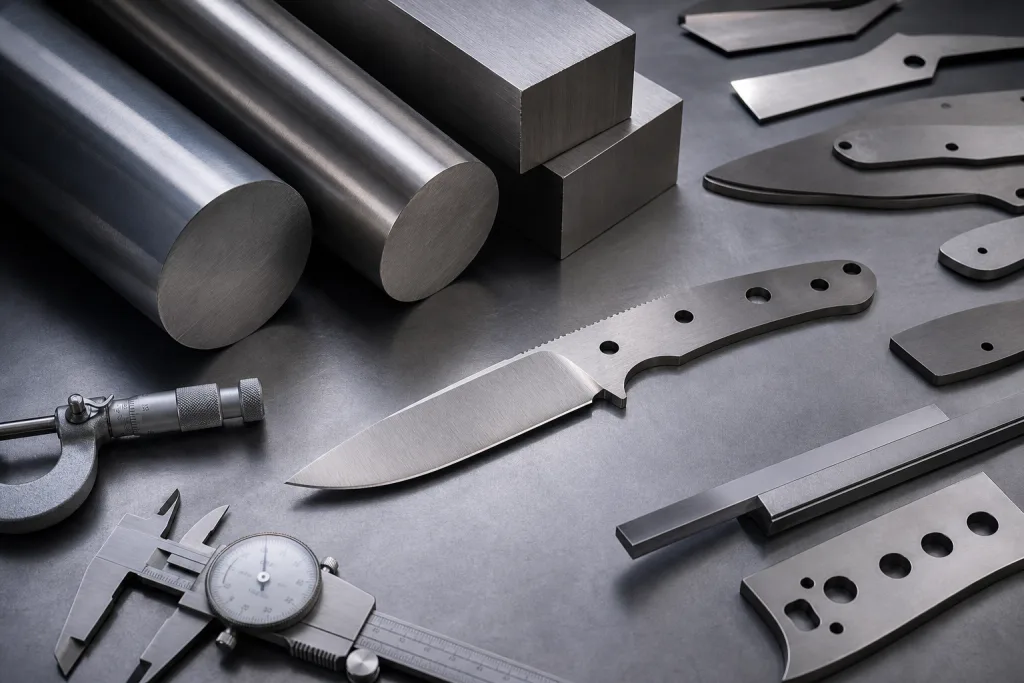
For each SKU, lock the blade steel and HRC band; blade thickness at heel, middle, and tip; grind type; bevel angle; edge thickness; finish grit; logo process; handle material; balance point; total weight tolerance. For kitchen knives, state whether the edge is V-ground, micro-beveled, or slightly convexed, because a 15 degree V edge cuts different from a 17 degree micro-bevel after 600 grit sharpening. For pocket and tactical knives, define lock function, detent feel, blade centering, pivot torque, and opening resistance where applicable. We run this into the work instruction before MOQ production starts, not after the buyer flags the first 50 pcs photo.
| Spec item | Typical approval range | QC method |
|---|---|---|
| HRC | 54-58 for common kitchen steel, 58-61 for high carbon or D2 blades | Rockwell tester, 2-3 points per batch |
| Edge angle | 14-20 degrees per side depending on use | Angle gauge or optical check |
| Thickness behind edge | 0.25-0.60 mm before final sharpening | Digital caliper or micrometer |
| Surface finish | 320, 400, 600 grit satin or mirror polish | Visual standard under fixed light |
| Inspection level | AQL 2.5 major, AQL 4.0 minor | ANSI/ASQ Z1.4 sampling |
For export orders to Europe and North America, confirm REACH, LFGB, and FDA food contact requirements when handles, coatings, adhesives, or packaging touch the order. A grinding sample can look right under the fixed light box and still fail salt spray or food-contact review. We ship to 23 EU and North American buyers, and the math does not work if the PO says “FDA” but the adhesive spec is missing from the BOM.
MOQ and price impact of grinding
Knife grinding process MOQ is a production number before it is a sales number. We set it from setup time, fixture cost, wheel choice, scrap allowance, and the finishing route on the grinding line. A simple kitchen knife on an existing blade blank may start at 500 pieces per SKU after we lock the 2.0 mm spine and bevel height. A new tactical folder with custom blade geometry, CNC handle scales, coating, and special packaging may need 1,000 pieces per SKU or more before the line runs steady.
Sampling cost moves with the work behind the sample. A basic OEM kitchen knife sample may cost USD 80-150 including setup, while a Damascus chef knife, custom pocket knife, or hunting knife with CNC handle and sheath can run USD 150-350 per sample. Tooling or dedicated grinding jigs may add USD 200-800 depending on the design. We had one buyer compare a hand-ground sample to mass production FOB pricing; the math does not work, because one sample may take 3 fixture checks and a separate belt change.
Grinding hits unit price in three places, and QC sees every one of them. Thinner, cleaner bevels need slower passes and operators who can hold the angle on a wet belt grinder. High-polish finishes need extra sanding steps and tighter rework control. Tight cosmetic standards raise rejection rate; QC pulled one 400 grit satin sample last month for a 0.3 mm wave near the tip. A satin 400 grit finish may be practical for a retail kitchen line, while mirror polish can add USD 0.40-1.50 per piece depending on blade size and defect tolerance.
At TANGFORGE, our monthly capacity is about 300,000 knives across categories, but capacity does not make every low MOQ order sensible. If your first order is a market test, we run the safer route: existing blanks, standard steels, and controlled custom branding. This is usually the right call. We have seen 300-piece trial orders go sideways when the buyer insists on a new grinding jig, new logo position, and new box insert on the same PO.
QC risks hidden inside good photos
Photos help, but they miss grinding faults we see every week on the line. The biggest one is heat burn. If the edge shows blue or straw color during belt grinding, the last 0.3-0.8 mm near the apex can lose hardness even when the spine still passes HRC testing. We had QC pull 12 samples from a trial lot last month: 3 looked clean in photos, but the edge rolled after 40 rope cuts. Bad sign. For serious orders, we check coolant flow at the grinding station and run a post-grind cut test, not just a nice top-view photo.
Asymmetry causes another batch of headaches. One bevel sits at 2.2 mm while the other is 1.5 mm, the tip leans left, or the plunge line does not match side to side. Knife users spot this fast, and the buyer flagged it on a 500 pcs chef knife order even though the samples still cut tomatoes. On chef knives, check the reflection line along the blade under a strip light. Waves usually mean the operator pushed too hard on the belt or changed pressure near the heel.
Burr control gets underpriced. A wire burr can make a sample feel sharp in a quick A4 paper test, then break off after 5-10 cuts and leave the buyer asking why the “approved” edge feels dull. Proper final sharpening removes the burr and leaves a clean apex. We run paper cut checks and 10x loupe inspection at QC; trained inspectors also use a light thumb-pad touch, never a hard drag across the edge. For premium programs, CATRA testing or rope cut comparison is the better call. The paper test alone is the wrong question to ask.
Surface finish defects include cross scratches, cloudy satin, uneven Damascus etching, and polishing compound stuck near bolsters or handle joints. A photo taken at 45 degrees can hide half of these. We once found black compound packed in a 0.4 mm handle gap after the PO said “mirror polish,” with mirror spelled “mirro” in the buyer file. These defects may not kill function, but they cut retail value. If your brand sells at USD 49.99, the cosmetic limit is not the same as a USD 149.99 knife. Put the scratch direction, acceptable pits per side, and etching contrast into the inspection standard before we run production.
How to approve samples without confusion
A clean sample approval process has four checkpoints: technical review, prototype sample, pre-production sample, then a sealed golden sample. Do not skip the pre-production sample just because the launch date is close. We have seen this go sideways when the grinding line changes to a new fixture, a different steel batch, a fresh coating supplier, or a revised handle mold; the sample looks fine, then bulk production drifts by 0.4 mm at the heel.
During technical review, send a drawing or reference sample and state the target market, retail price, packaging type, compliance needs, and expected order quantity. Put the MOQ on the table too: 300 pcs for stock handles is a different job from 1,200 pcs with a new ABS mold and color box artwork. A good factory should push back when the spec does not match the knife. Asking for 61 HRC on low-cost 3Cr13 kitchen knives is not practical. Asking for a 12 degree per side edge on a heavy outdoor chopping knife is the wrong question to ask; QC pulled one sample like this after 80 rope cuts, and the edge had visible rolling under a 10x loupe.
The prototype sample proves shape and hand feel. Test it the way your customer uses it: tomatoes for kitchen knives, cardboard and rope for utility blades, meat trimming for boning knives, wood shaving for outdoor knives. Simple tests tell the truth. The pre-production sample proves we can repeat the knife with production workers, production belts, production fixtures, and the same inspection gauges used for bulk. If the prototype took 12 days but the pre-production sample takes 18 days, accept the 18 days; the math does not work if 2,000 pcs start before the belt angle and handle gap are locked.
When you approve, write the decision clearly: approved as is with the signed sample tag, approved with listed drawing changes and revised tolerances, or rejected with measured reasons such as “tip length short by 1.5 mm.” If approved with changes, do not rely on email text only. Update the drawing, tolerance sheet, artwork, and QC checklist; one buyer once left “matte black” in the PO while the artwork said “satin black,” and the cartons were already printed. We keep sealed golden samples in our Yangjiang sample room and match bulk production against them under fixed lighting, with caliper readings and inline/final inspection notes recorded batch by batch.
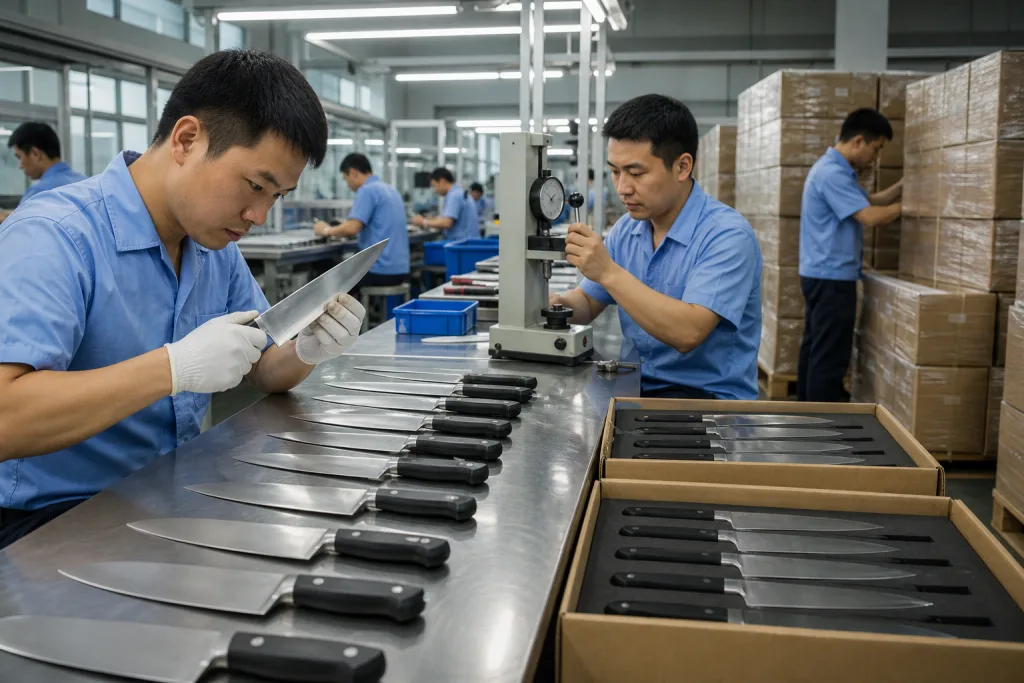
Factory checklist before mass production
Before you release a purchase order, ask for the factory’s production control plan, not just the sample photos. It should show incoming steel check with caliper reading, blanking or forging control, heat treatment batch records, grinding route, sharpening method, handle assembly check, cleaning standard, packaging spec, and final inspection. Paperwork feels dull, but it tells you if the team can repeat the approved sample across a 1,200 pcs MOQ run. We run this sheet beside the grinding line, and QC signs off each lot before blades move to the next tray.
For the knife grinding process OEM workflow, we ask for three hard checkpoints. Check after heat treatment and before grinding for HRC, blade straightness within 0.5 mm, and visible warping under the bench light. Check after rough grinding for bevel symmetry; QC pulled the sample last month because one side was 1.8 mm higher at the heel. Check after final sharpening and finishing for edge bite, cosmetics, laser logo position, polybag, and inner box label. Waiting until cartons are sealed is the wrong place to save time. The math does not work.
Agree on defect classification before production starts. Major defects include cracked blades, failed lock function, unsafe loose handles, wrong steel, wrong HRC outside the agreed band, severe bevel asymmetry, exposed burrs, or rust found during the 24-hour room check. Minor defects may include satin shade variation under 1 grade, handle color drift inside the approved sample range, or carton scuffing that does not break the flute. For 6 out of 10 mid-market programs we ship, AQL 2.5 major and AQL 4.0 minor is a practical starting point; premium retail lines usually ask us to tighten the pull plan before deposit. We have seen this go sideways when the PO says “same as sample” but the approved sample has no signed defect limit.
If you import into Europe or North America, confirm labeling, FNSKU or barcode placement, carton drop test rules, and trade term before the first mass-production grinding wheel touches steel. FOB, CIF, DDP, and Amazon-ready packing change the carton mark and inspection timing, so put it on the PO in plain words. One buyer flagged a typo, “FNSUK,” after 38 cartons were printed, and nobody enjoyed that rework. Grinding approval is one part of the order, but it is the part your customer feels in the first 10 seconds of use.
Frequently asked questions
Include blade steel, target HRC band, blade thickness, grind type, bevel angle, thickness behind the edge, finish grit, edge sharpness test, logo method, handle material, and packaging notes. For example, an 8 inch chef knife could specify 1.4116 steel, 55-57 HRC, 2.0 mm spine, 0.35-0.45 mm behind the edge before sharpening, 15 degrees per side, and 400 grit satin. Add photos showing acceptable and unacceptable finish. The approval sheet should also state AQL levels, usually AQL 2.5 for major defects and AQL 4.0 for minor defects. If you approve by email only, production teams may miss small but important changes.
For many OEM kitchen knives, a realistic MOQ starts around 500 pieces per SKU if the blade shape, steel, and handle structure are close to existing production. For custom pocket knives, hunting knives, tactical knives, or Damascus knives, 800-1,000 pieces per SKU is more common because grinding fixtures, CNC parts, coating, or sheath setup must be spread over the order. If you need only 100-200 pieces, ask whether existing blanks and standard handles can be used with private label laser engraving. That usually keeps sampling and unit cost under control, but it gives you less freedom on blade geometry.
Visible blue, purple, or straw coloring near the edge is a warning sign, but overheating is not always visible after polishing. Ask the factory how it controls belt speed, pressure, coolant, and operator inspection. For higher-risk steels or thin edges, request HRC checks near the working area where possible and add cutting tests after sharpening. A practical test set can include paper cut, 10 mm rope cuts, cardboard slicing, and edge inspection under magnification. If a sample feels sharp at first but loses bite after light use, burr residue or heat damage may be the cause.
For simple logo placement or packaging, photos and videos may be enough. For grinding approval, they are not enough unless you are repeating an already approved SKU. You need to hold the knife, check balance, inspect bevel symmetry under light, test cutting feel, and measure key dimensions. We usually recommend shipping 2-3 physical samples per SKU: one for your office, one for destructive or functional testing, and one to keep as a reference. If timing is tight, use video for early feedback, then approve the pre-production sample physically before bulk grinding starts.
Reject major safety and function defects immediately: cracked blades, loose handles, failed locks, wrong steel, wrong HRC, rust, exposed burrs, sharp handle gaps, severe bevel mismatch, or tips bent beyond tolerance. Cosmetic rejection depends on your approved standard, but common issues include deep cross scratches, uneven satin direction, cloudy polishing, poor Damascus etching, and dirty glue lines. For export production, define these as major or minor before inspection. AQL 2.5 major and AQL 4.0 minor is a reasonable baseline, but premium knives may need tighter rules and 100% inspection for visible blade finish.
Send Your Grinding Specs for Review
Share drawings, target MOQ, steel choice, and retail price point. Our Yangjiang engineering team will comment on feasibility, sampling cost, and QC risks before tooling.
Request a Quote