A 6 mm brass pin costs under USD 0.03, but it can still stop a 5,000-piece knife order. QC pulled 32 handles at pre-assembly after the pins read 5.82 mm on a Mitutoyo digital caliper, with cutting oil still sitting on the end face. Bad fit shows fast. Under-size pins leave play in the scale, over-size pins split wood at pressing, and a burred cut face marks the handle before the grinding line even reaches final sharpening.
At TANGFORGE in Yangjiang, Zhejiang, China, we treat handle hardware as a controlled component, not loose accessory material. For brand owners and QC managers, knife rivets pins sourcing needs the same discipline as steel grade, HRC band, blade thickness, and packaging; the buyer flagged this once after a PO typo changed brass pins to stainless pins on 3,000 sets. Small cost. Real risk. Asking only for the cheapest pin is the wrong question to ask, because the math does not work when 1 pin blocks 3,000 finished handles.
Why cheap hardware becomes expensive
Fasteners look cheap on a knife cost sheet. They get expensive at the bench. A 6 mm pin touches the tang hole, handle scale, epoxy gap, belt grinder, buffing wheel, carton insert, and the buyer’s first look at the knife, so treating it as “small hardware” is how the math gets ugly. We have seen this go sideways. QC pulled 32 pcs from an AQL 2.5 check because one brass rivet sat proud after polishing, about 0.18 mm above the scale by caliper. The order still shipped, but the grinding line slowed from 1,200 pcs/day to 740 pcs/day, two operators reworked the batch with 400 grit belts, and the scrap bill did the talking.
The usual mistake is simple. Buyers approve the blade and handle drawing, then the BOM says “brass rivets” or “mosaic pins” with no tolerance, finish callout, grade, or signed sample taped to the QC board. That is the wrong question to ask if the order is going above 1,000 pcs. A 0.10 mm diameter change can decide whether a pin fits cleanly into G10 or pakkawood; micarta, bone, stabilized wood, and full tang stainless steel each push back in a different way under an arbor press. If the hole is 6.00 mm and the pin arrives at 6.12 mm, the operator forces the fit, stresses the handle scale, and hairline cracks show up during peening or final sanding.
At our Yangjiang, Zhejiang facility in China, one monthly plan can run kitchen knives beside hunting knife orders, while 300 pcs of Damascus blades wait on the next rack for handle assembly. One wrong bin of pins should not stop 20,000 knives/month of capacity. We ask for hardware samples, dimensional targets, and clear visual limits before mass production, usually with a 20 pcs pre-production pull on the bench. It sounds fussy until the grinding line finds 600 handles with black rings around brass pins because polishing compound packed into a bad countersink, and the buyer flagged the photos before balance payment.
Cost drivers behind rivets and pins
Knife hardware price breaks into two buckets: raw metal and the work after cutting. Diameter and length decide how much bar stock we lose; head shape and finish standard decide how many hands touch the part after the cut-off saw. Simple enough. A plain 304 stainless rod pin stays cheap because we run 3-8 mm standard bar through the automatic cut-off saw, then deburr both ends to about 0.1 mm on the small chamfer wheel. A Corby-style bolt costs more because the lathe turns the body, QC checks each thread with a go/no-go gauge, the slot gets cut, and head height must stay inside the drawing tolerance. Mosaic pins are a different price bracket. The tube has to match the drawing, the inner rods need a repeatable layout, resin fill cannot leave pinholes, and the final polish shows every small mistake. Comparing them with a straight pin is the wrong question to ask.
For most OEM knife projects, rivets and pins cost less than blade steel or handle scales, but the customer touches the hardware before reading any spec sheet. One bad rivet can spoil the knife. If a low-cost rivet stains after a salt-spray check, or sits 0.3 mm proud after handle sanding, a USD 35 retail knife starts looking like a bargain-bin item. We've seen this go sideways on a 1,200 pc hunting knife order: the blade passed, the sheath passed, then the buyer flagged cloudy hardware under the packing table light. On premium hunting knives and chef knives, buyers often complain about hardware finish before they ask about 58 HRC or edge angle. QC sees it first.
| Hardware type | Typical size | Factory cost range | Common MOQ | Lead-time impact |
|---|---|---|---|---|
| Straight brass pin | 3-8 mm dia. | USD 0.02-0.06/pc | 5,000-10,000 pcs | 3-7 days if stock |
| 304/316 stainless pin | 3-8 mm dia. | USD 0.03-0.08/pc | 5,000-10,000 pcs | 5-10 days |
| Tubular rivet | 4-8 mm dia. | USD 0.04-0.12/pc | 5,000 pcs | 7-12 days |
| Corby or Loveless bolt | 5-8 mm dia. | USD 0.12-0.45/set | 1,000-3,000 sets | 10-18 days |
| Mosaic pin knife hardware | 6-10 mm dia. | USD 0.30-1.80/pc | 500-2,000 pcs | 15-25 days |
These ranges are FOB China factory-level references, not retail accessory prices from a knife parts shop. If the project needs REACH declarations, LFGB/FDA support for food-contact kitchen knives, or anti-tarnish packing with sealed PE bags and desiccant, price it before the knife PO is released. QC pulled one sample last month where the PO said "304 brass pin"; that typo alone held the grinding line for 2 days while the buyer confirmed the material. Small line item. Big headache.
MOQ tiers that affect your order
MOQ for pins is a production-cost issue, not a supplier trick. We buy bar stock by bundle, set the automatic lathe once for each diameter, then pay plating or passivation by batch. Cutting loss still counts; a 4 mm stainless pin leaves scrap at both ends after the saw cut and chamfer wheel. If you order 600 knives with three custom mosaic pins per handle, the hardware shop may still run 2,000 pins because the pattern tube wastes material at 1,800 pieces. The math doesn't work.
For new brand programs, I split hardware into three working tiers. Tier one is stock hardware: brass rod and 304 stainless pin, plus simple tubular rivets in 4 mm, 5 mm, 6 mm, and 8 mm. We pull these from Yangjiang channels, and QC checks diameter with a 0-25 mm micrometer before assembly. Tier two is semi-custom: special head shape, black oxide stainless, nickel-free requirement, or tighter diameter tolerance such as +0.00/-0.03 mm. Tier three is full custom: branded mosaic pattern, colored tube, special alloy, custom screw head, or one matched hardware set across several SKUs. We have seen this go sideways when the buyer approves the knife sample but forgets to approve the pin finish under daylight at the sample table.
The cost gap is not just the pin price. Tier one hardware can move into knife assembly within 3-10 days. Tier two takes 10-18 days because we need samples and surface-treatment approval; QC pulled one black oxide sample last month for patchy color near the rivet head. Tier three takes 20-35 days including drawings, trial pieces, buyer approval photos, and bulk production. If your finished knife lead time is 45-60 days, custom hardware can eat half the calendar before the first handle scale touches epoxy on the gluing bench.
For TANGFORGE OEM orders, a practical knife MOQ is 300-500 pieces per SKU for existing designs and higher for new tooling. Hardware MOQ can sit above that. The clean move is to run one pin specification across 2-4 SKUs, then consume the same hardware across 2 or 3 production runs. We ship this way often; one PO typo changed 6 mm to 8 mm, and the buyer flagged it only after the grinding line had already scheduled handle drilling.
Lead-time map from drawing to assembly
Lead time breaks when buyers leave rivets and pins for the last PO revision. If the product photo shows mosaic pins, we start the sourcing clock before handle production. Not after. We need confirmed diameter, exposed length with tolerance, pattern direction, material certificate when the buyer requests it, and the assembly finish: belt-ground flush, domed, peened, screwed, or polished after fitting. “Can we decide the pin later?” is the wrong question to ask. The caliper does not care. A 6.0 mm hole and a 6.35 mm pin already fight on the drilling jig, and we have watched operators lose 12 minutes per tray trying to save that mistake.
A realistic timeline for custom handle fasteners is simple. Days 1-3: drawing check and BOM confirmation. Days 4-7: supplier sample or existing sample matching. Days 8-12: buyer confirmation by photo, video, or DHL sample. Days 13-25: bulk hardware production. Days 26-28: incoming inspection at the knife factory. QC pulled the sample. Only after the pin passes diameter check, surface check, and pattern check should full handle drilling and assembly begin. Skip the early sample stage and the same issue comes back on the grinding line: misfit holes, wrong color against the handle slab, or a mosaic pattern running opposite across 2,000 pieces.
For a standard production knife using stock 6 mm stainless pins, we can often keep the normal 45-60 day lead time after deposit and final artwork approval. For a custom mosaic pin knife project, plan 60-75 days unless the pin is already stocked and approved in our sample room. For private-label packaging with FNSKU labels, carton drop tests, DDP delivery, and third-party inspection, add 7-14 days to the commercial timeline. We have seen this go sideways when the buyer approved the blade sample but left the barcode file until week 6; one PO even had the FNSKU typed with one missing digit, and the warehouse caught it only during carton label printing.
One practical rule: freeze the hardware specification before handle material is cut. Drilling 5,000 micarta scales to 6.0 mm and later changing to a 6.35 mm imported pin is not a small adjustment. The math does not work. It means redrilling on the bench drill, fit testing with a go/no-go pin, micarta dust all over the line, extra labor, and oval holes after final sanding become much easier to create.
Defects caused by poor fastener selection
Handle rivet QC failures often start as tiny misses. QC finds 20 or 30 repeat defects in one inspection lot, AQL results drop, and the buyer asks us to sort 1,200 pcs before shipment. First problem: proud or sunken hardware. If the rivet head or pin end is not flush after the 400# belt on the grinding line, the handle feels rough and looks cheap under side light. On kitchen knives, a 0.15 mm proud edge is enough for a buyer to catch with a thumb after handle polishing.
Cracking around the hole is the next one. It shows up when the pin diameter runs oversized, the handle material is brittle, or the operator gives the arbor press one extra hit during peening. Stabilized wood and horn need lighter pressure than G10. Bone and some resin handles are worse; we have seen 2 mm hairline cracks open after final buffing. Asking for a harder pin is the wrong question. If the fastener cannot deform a little, the handle material takes the stress instead.
Staining and color bleed cause quiet trouble. Brass can darken pale maple or birch after polishing compound sits around the pin for 24 hours. Carbon steel tangs leave dark lines if moisture sits near the rivet hole. Low-grade stainless hardware can show rust after salt spray or humidity testing, and QC pulled the sample last month for two orange dots beside a 3 mm pin. For North American and European retail, visible rust on a new knife is a major defect, not a cosmetic debate.
Pattern inconsistency hits mosaic pins the hardest. A mosaic tube must be cut cleanly on the small chop saw and set in the same direction before epoxy. If one side of the handle shows a flower pattern and the other side shows a random offset, the customer reads it as mismatched workmanship. We check mosaic pins before assembly and again after final polishing under 500-800 lux inspection light. Small part, big argument.
Adhesive failure around the pin is another rework trap. Oil from drilling, polishing wax, or dirty hands can weaken epoxy bonding, and the math doesn't work if 6 handles out of 200 need rework after curing. Hardware should be degreased before assembly, especially on outdoor knives expected to handle wet use. We run acetone wipe-downs on pins before glue-up when the MOQ is small enough for hand control, usually 300 pcs instead of a full 3,000 pcs run.
QC checks before mass handle assembly
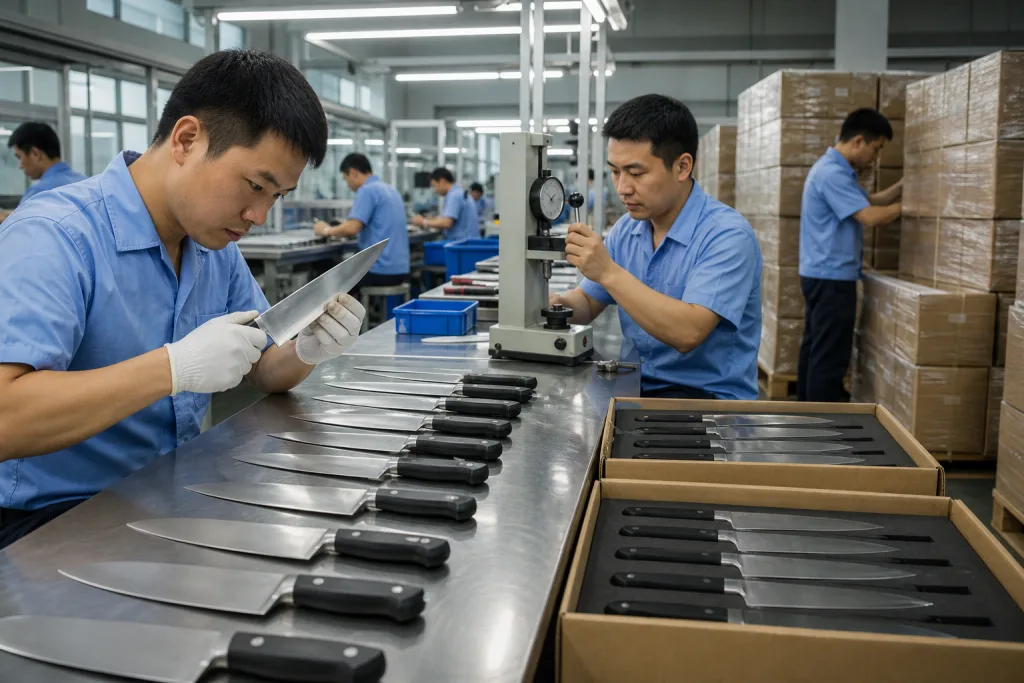
Good handle rivet QC should be dull, measured, and closed before the handle room starts. At incoming inspection, we check diameter with Mitutoyo calipers and 6.00 mm pin gauges, then check length, surface oil, burrs, chamfer, head shape, Corby bolt thread fit, material color, and carton labels. QC pulled the sample last month and found brass rod running 0.08 mm oversize; it would have jammed in our drilled 6.0 mm handle holes. For critical hardware, we run a tighter internal sampling plan than finished goods inspection because one bad pin batch can spread into 40 cartons before the handle team notices.
For a typical export knife order, finished goods inspection may use AQL 2.5 for major defects and AQL 4.0 for minor cosmetic defects. Stop hardware earlier. If we receive 10,000 brass pins, final assembly is the wrong place to find the problem. By then we have already paid for drilling, epoxy mixing, clamping, 240-grit belt grinding, polishing, cleaning, and packing. One 0.05 mm burr can waste 12 days of handle work instead of 18 minutes at incoming QC. The math doesn't work.
Useful specifications are short. State the pin material, diameter tolerance, exposed finish, target length, burr allowance, chamfer requirement, and color range with a limit sample. Example: “304 stainless straight pin, 6.00 mm diameter, tolerance +0.00/-0.05 mm, length 26.5 mm +/-0.20 mm, both ends chamfered 0.2-0.4 mm, no black oil, no visible rust, no burrs affecting insertion.” We had one PO typed as 25.6 mm instead of 26.5 mm, and the buyer flagged it only after the CNC drilling jig was already set. That one line saves 6 people from arguing beside the grinding line.
For mosaic pins, add pattern approval. We prefer one signed sample, one photo standard with the pattern direction marked, and one production reference kept at the assembly line in a zip bag. For private-label work, the QC manager should confirm whether hardware defects count as major or minor in the inspection checklist. A loose rivet, cracked handle, rust spot, or sharp exposed pin edge should be major. Slight color shade variation can stay minor if the approved sample allows it, but we have seen this go sideways when the catalog photo shows a cleaner copper ring than the production pin.
Specification choices that reduce total cost
The cheapest pin is not the lowest-cost pin. The right pin drops into the handle cleanly, peens without cracking the scale, passes AQL 2.5 visual checks, and does not come back as a retailer complaint. Start simple. For a first production run, freeze the hardware spec before paying for decorative work. We run 304 stainless or brass straight pins on kitchen and chef knives with clean handle lines, usually 5 mm or 6 mm, and QC checks them with a go/no-go gauge before the handle press starts. For heavier outdoor knives, Corby-style bolts or mechanical fasteners make more sense because the handle takes impact. Mosaic pins belong only where the buyer can charge for the look, such as gift sets or premium hunting knives. On a 1,000-piece basic chef knife order, the math does not work.
Avoid mixed diameters inside one order. If one SKU uses 5 mm brass, another uses 6 mm stainless, and a third uses 6.35 mm mosaic pins with a different drilling depth, the fixture changes, the bin labels change, and the operator gets 3 extra chances to grab the wrong hardware. We have seen this go sideways. QC pulled the sample and found a 6 mm hole opened to 6.2 mm after rework on the bench drill. Then the pin sat proud after peening. For a 1,000-piece trial order, that setup cost rarely pays back the buying team's time. A common 6 mm pin across several SKUs cuts fixture changes from 3 rounds to 1 and keeps spare inventory under control.
Match the hardware to the handle material before the sample room drills the first scale. For black G10 or micarta, stainless pins stay clean and usually pass salt-spray expectations better than brass. For classic wood handles, brass gives warmer contrast, but packing needs tarnish control, especially after 18 days at sea versus 12 days by air. For white resin, bone, or pale pakkawood, run a staining test before approval; the buyer flagged yellow halos on pale pakkawood once after buffing compound stayed around a 5 mm brass pin. For full tang knives hardened around 54-58 HRC, confirm drilling and pin fit before heat treatment, or confirm fixture drilling after hardening with the right carbide bit. If the buyer only compares pin price per piece, this is the wrong question to ask.
Our practical recommendation from Yangjiang, Zhejiang, China production is simple: approve hardware at the same time as the pre-production knife sample. Keep 2-3% spare pins for replacement and process loss, because the grinding line will lose a few during handle shaping and QC may reject pins with scratches or loose mosaic cores. Lock the BOM before bulk handle drilling. One buyer sent a PO with “6.5 mm” typed instead of “6.35 mm,” and that small typo would have scrapped 500 drilled handles if the sample room had not stopped it with a caliper check. When the buyer and factory work from the same hardware standard, the small part stays small.
Frequently asked questions
For most kitchen knives, 304 stainless steel is the safest default because it resists rust, polishes cleanly, and matches common bolsters or stainless blades. Brass is acceptable when you want a warmer look, but it can tarnish and may stain pale wood or resin if not controlled. For food-contact export programs, we normally confirm REACH and, where relevant, LFGB or FDA supporting documents for handle materials and coatings. Typical kitchen knife pins are 4-6 mm diameter. If the knife is dishwasher-marketed, be careful: water, detergent, and heat cycling make poor hardware and weak epoxy fail faster.
A mosaic pin knife design usually adds USD 0.30-1.80 per pin at factory level, depending on diameter, pattern, tube material, resin fill, and MOQ. If a handle uses three mosaic pins, the added hardware cost can be USD 0.90-5.40 per knife before extra inspection and polishing time. MOQ is commonly 500-2,000 pieces per pattern, so a 300-piece knife order may still need excess hardware inventory. Lead time is usually 15-25 days for the pins alone. For premium Damascus, hunting, or gift-set knives, the visual value can justify it. For entry retail, it often hurts margin.
For straight pins, a practical specification is diameter tolerance of +0.00/-0.03 mm or +0.00/-0.05 mm, depending on material and assembly method. Length tolerance is often +/-0.20 mm for cut pins, tighter if the part is pre-headed or mechanically fastened. The hole size must be matched to the pin and handle material. A brittle handle may need slightly more clearance and stronger epoxy control rather than a force fit. For bolts, also specify thread engagement, head diameter, slot depth, and finish. Without tolerance, handle rivet QC becomes subjective, and inspectors will argue over defects after the knives are already packed.
Sometimes, but do not assume it. A 6 mm stainless pin can work for many full tang kitchen knives and outdoor knives, which helps MOQ and inventory. However, outdoor and tactical knives may need mechanical fasteners, larger diameter pins, or tougher assembly because handles see impact, water, cold, and twisting force. Kitchen knives usually prioritize corrosion resistance, comfort, and clean polishing. If you want one hardware family across both categories, test pull strength, side impact, salt spray or humidity exposure, and handle comfort. One shared pin spec is efficient, but only when it passes the use case.
Inspect hardware twice: once at incoming material and again after final handle finishing. Incoming inspection should check diameter, length, burrs, chamfer, surface oil, rust, color, and quantity before drilling or assembly starts. Finished inspection should check flushness, cracks, looseness, staining, sharp edges, and pattern alignment. For export orders, we recommend finished goods inspection using AQL 2.5 for major defects and AQL 4.0 for minor defects, with loose rivets, cracked handles, rust, and sharp exposed pin edges treated as major. Waiting until final inspection to discover bad pins wastes 30-50 minutes of accumulated labor per affected knife.
Send your handle hardware spec for review
Share drawings, pin diameter, handle material, target MOQ, and inspection standard. TANGFORGE will check cost, lead time, and QC risk before bulk knife production.
Request a Quote