Buyers send paring knives back for the same three faults: the tip sits off-center, the grind pulls to one side, or the edge looks clean but drags in use. On a 90 mm paring blade, a 0.5 mm tip error slips past a screen and shows up in the hand right away. QC pulled the sample on the bench, and the checklist had better catch it before the carton is closed.
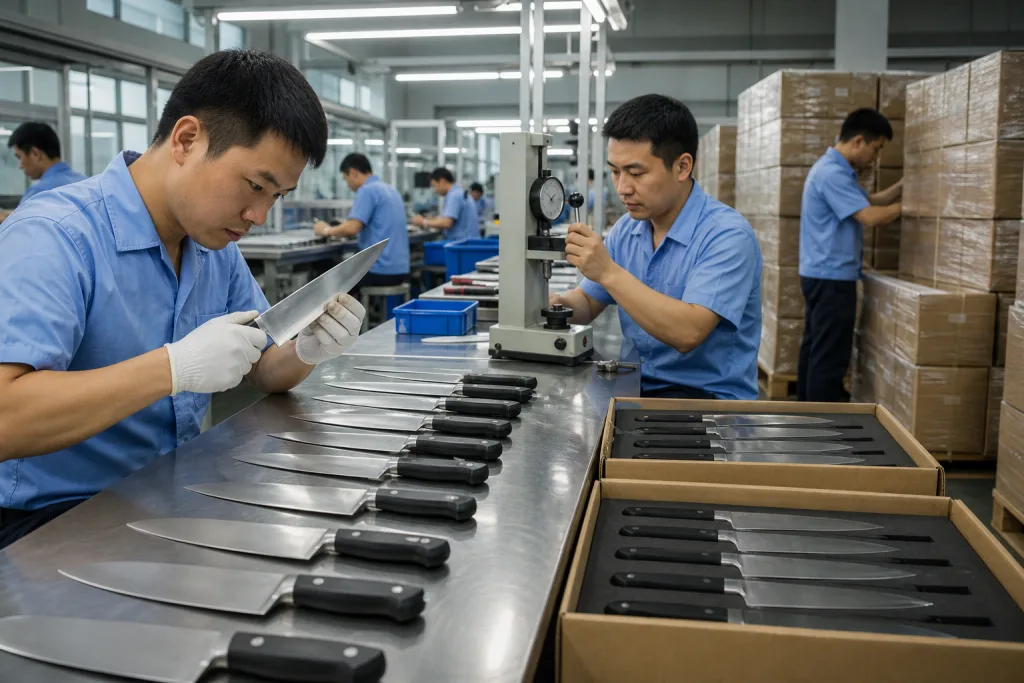
At TANGFORGE in Yangjiang, China, we run export checks the same way for Europe and North America: inspect the point, measure the grind, then verify the edge finish before packing. Our China production lines can run about 240,000 units per month, so the check has to move fast and still hold the line. If you buy from Yangjiang, Zhejiang, or another China source, the spec should tell the factory what fails, what passes, and why. This is the wrong question to ask if the checklist is only cosmetic.
Why Paring Knives Fail First
Paring knives get rejected during small cuts: peeling 6 oranges, trimming strawberry hulls, cutting out potato eyes. The user feels the fault in the first 2 cuts. Fast. On our QC bench, a 90 mm sample with a loupe-checked bent tip or a rough 800-grit edge will fail faster than the same issue on a chef knife, so tip condition, grind symmetry, and edge finish cause most of the return claims we see.
In knife inspection, function beats a clean photo. A light scratch on the spine is usually a B-grade note, not a shipment stopper. A tip sitting 1 mm off center, a bevel drifting left by 0.3 mm, or a burr still hanging after final sharpening shows up as soon as the buyer cuts a lemon wedge. QC pulled the sample last month on a 90 mm paring knife because the blade steered left on paper strip testing; the buyer flagged it before we even discussed carton marks. The math doesn't work if you chase polish first and miss the cut.
- Tip defect: the point skates on citrus peel or bends during first use, often from a thin tip under 0.2 mm after grinding.
- Grind defect: the blade steers instead of cutting straight, usually when the left and right bevel widths do not match under the caliper.
- Edge finish defect: the knife feels sharp for 1 cut, then drags because a wire burr survived final honing.
Quality control should check these failure modes before secondary appearance items. We run tip alignment, bevel balance, and burr checks before the packing line sees the knives.
Inspect the Tip Geometry First
Start at the point. A bad tip is not just a cutting complaint; it also punches trays and slice cards during packing. On our QC bench we check it under a 10x loupe, then confirm the point sits on the blade centerline. For a standard 80-100 mm paring knife, we keep tip offset within 0.5 mm and reject any point with a visible flat, burr roll, or hook in the last 2 mm of the blade.
Use a caliper or profile gauge when the buyer’s drawing calls out the nose shape, but don’t turn this into lab work. This is the wrong question to ask if the knife already looks crooked by eye. Rotate the blade on a granite plate or flat glass; the tip should track cleanly without wobble. If the point leans left or right, the cook corrects the cut with wrist pressure, and we’ve seen that defect come back after 1 prep shift.
- Check centerline alignment from heel to point, then record the tip offset in mm on the QC sheet.
- Reject a bent tip, even if the grinding line can push it straight by hand.
- Inspect after sharpening and again after packaging, because blister tray pressure can deform the point before shipment.
If you are buying from Yangjiang, China, ask the factory to send 3 tip photos at PP sample stage, not only at final inspection. QC should pull the sample after sharpening, before the packing team starts loading inner boxes.
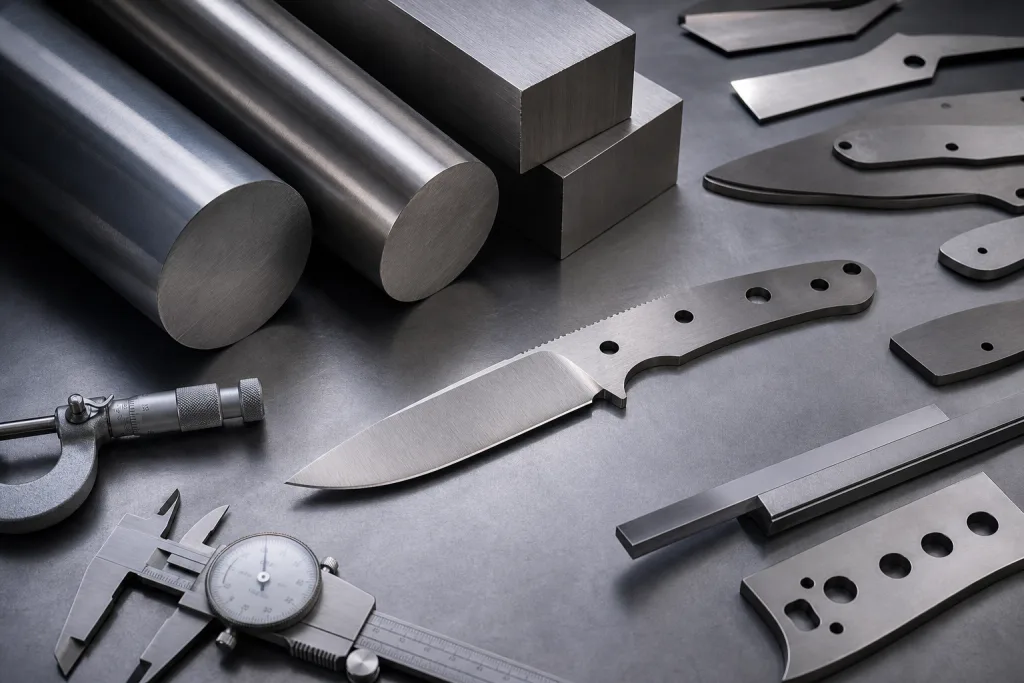
Control Grind Symmetry and Taper
The grind is where a paring knife feels controlled or feels like a low-bid sample. We run the 90 mm blades through the grinding line and check taper from heel to point, then QC pulls 5 pcs per tray before polishing. Both sides need to remove stock at the same pace. If one side is thicker by 0.2 mm at mid-blade, the knife drifts in apple peel and the buyer flags it as a quality control miss.
For a 2.0-2.5 mm spine thickness on a 90 mm blade, keep the bevel steady and the shoulders clean. Most paring knife bevels sit at 15-18 degrees per side, but chasing the exact angle is the wrong question to ask if left and right do not match. Use a profile projector or digital caliper for first article approval, then let the line inspector use a visual go/no-go gauge every 30 minutes.
| Check point | Target | Reject when |
|---|---|---|
| Centerline offset | Within 0.2 mm at mid-blade | Blade pulls left or right during cut test |
| Bevel angle | 15-18 degrees per side | One side looks steeper under the angle gauge |
| Flat spot on grind | Under 1 mm | Inspection lamp catches a dead flat patch |
| Spine taper | Smooth, continuous drop | Step or wave shows in the profile projector |
A grind problem is hard to hide later. We have seen this go sideways on a 3,000 pcs order: polishing made the blade shine, but QC still found the same wavy shoulder under the LED bench light. Once the geometry is wrong, extra buffing only makes the defect prettier.
Verify the Edge Finish Carefully
Edge finish is where a lot of factories get lazy. They pass the paper test and never look at the burr. We run the edge under a 10x lamp at the grinding line because a blade can cut one sheet clean and still fail after one carton shake if a wire edge is left on the apex. On paring knives, that finish has to stay clean and even, with no chips, since the user cuts toward the hand.
Use three checks: look at the edge under light, feel for a continuous burr with a controlled swipe on soft media, then test the cut on paper, tomato skin, or a peeled potato. QC pulled the sample on a 1200-grit finish once, and the buyer flagged it because the edge looked sharp but snagged on tomato skin. We do not push finger tests. That is the wrong question to ask. The goal is to confirm the apex holds, not to prove it can shave hair. If the knife is a stainless blade in the HRC 56-58 range, a stable edge should clear your internal paper-cut standard on 8 out of 10 sample pieces without tearing.
- No reflective glint along the full edge line.
- No micro-chips greater than 0.1 mm.
- No burr that folds over after a single light cut.
- No drag on the first 3 cm of a push cut.
If the edge feels too polished, the knife skates on wet produce; if it is too toothy, it tears instead of slicing. We have seen that go sideways on a stamped paring knife run, and the math does not work for the end user. You want controlled bite, not a rough saw. If you use CATRA or an internal sharpness gauge, keep the method fixed lot to lot.
Use AQL and Measurement Together
Match the sample size to the order size and the risk on the PO. For a 3,000-piece MOQ or a 10,000-piece import lot, one final photo set is not enough. We freeze the PP sample first, then lock the same checks for in-process and final QC. If you buy FOB China or route cartons through a Zhejiang warehouse, keep one checklist for production, packing, and carton audit. On our Yangjiang line, the fastest way to protect a 35-45 day lead time is simple: catch tip and edge problems before the grinding line starts cranking.
A common setup is AQL 2.5 for major defects and AQL 4.0 for minor defects, with critical defects at zero. Use Level II sampling unless your buyer has a tighter spec on paper. That is the right baseline. At QC bench 3, we pulled the sample with a caliper, loupe, and paper test, and the knife either passed the spec or it went back for rework.
| Stage | Sample | Tool | Pass condition |
|---|---|---|---|
| PP sample | 5 pcs | caliper, loupe, paper test | Spec approved before mass run |
| In-process | 1 every 30 min or 10 pcs | go/no-go gauge | Tip, grind, edge stay within limit |
| Final | About 200 pcs on a 5,000 pc lot | AQL checklist | No criticals, no wire edge, no bent point |
Do not skip carton inspection. A blade can pass QC and still land with a crushed tip if the insert is loose or the tray shifts in transit. We have seen that go sideways on a tight export carton, and the buyer flagged it fast.
Turn Findings Into Corrective Actions
A checklist has value only when defects go back to the grinding line. If tip failures exceed 1.5% in final sample, stop release and trace the lot by shift, wheel grit, operator ID, and packing tray cavity number. We run this check on the QC bench with a 10x loupe and a 0.2 mm feeler gauge; if 6 pieces fail in a 400-piece pull, the math doesn't work. For edge defects, compare the first 10 pieces after wheel change with the last 10 pieces before it. That usually shows whether the damage came from sharpening, polishing, or rough handling in the tray.
Ask the factory for three photos per defect class, the retained sample, and the corrective action note. That is normal quality control, not extra paperwork. ISO 9001 logs help, but the blade still has to pass the bench test; QC pulled the sample last month and the paper log was clean, while two tips had rolled points under the light box. If the issue is packaging deformation, change the tray depth from 8 mm to 12 mm or add a blade guard before blaming the grind. This is the wrong question to ask first. A 1 m drop test on the retail carton is a cheap way to check whether the point survives transit. For export programs into Europe and North America, keep the same traceability file with REACH, LFGB, or FDA material records when they apply.
In a fast plant, the QC checklist should be short enough for the bench and strict enough to stop the line. We ship better when the inspector can mark tip, grind, and edge finish in under 90 seconds per knife, with AQL sheets clipped beside the caliper. If you build the sheet around tip, grind, and edge finish, you catch most returns before they leave Yangjiang, China.
Frequently asked questions
For most buyers, the biggest complaints come from a damaged tip, a grind that steers, or an edge that feels sharp but still drags. In practice, tip problems are the easiest to spot and often the most visible in use. If the point is off-center by more than 0.5 mm on an 80-100 mm blade, the knife feels wrong immediately. A burr left after sharpening can also cause early failure because it folds over after a few cuts. That is why we tell QA teams to inspect the point first, then the grind, then the edge finish. If you only have time for one function check, do a paper cut and a tomato skin cut on at least 10 samples.
Do not use a vague description like 'razor sharp.' Ask for a repeatable test. For a stainless paring knife in the HRC 56-58 range, we like to see a clean push cut on 80 gsm paper, plus a clean cut on tomato skin without crushing. A sharp blade can still be bad if it has a wire edge, so check edge stability after the test. If your program uses CATRA or another internal sharpness method, lock the method and the acceptance limit before mass production. For imported retail packs, we also recommend testing 8 out of 10 sample pieces to avoid approving only the first perfect knife off the line.
AQL 2.5 for major defects and AQL 4.0 for minor defects is a practical starting point for most paring knife programs. Keep critical defects at zero, especially anything involving a broken tip, exposed crack, or dangerous edge failure. For a 5,000-piece lot, a Level II final inspection often lands around 200 pieces, which is enough to see patterns without slowing the shipment too much. I still recommend a 5-piece PP sample and a small in-process check every 30 minutes or every 10 pieces, because a bad grind can build fast on a high-speed line. Use the same AQL logic for FOB China or DDP programs so the factory knows the target before packing starts.
Start with a caliper at the mid-blade and compare left and right thickness. On a typical 90 mm paring knife, a side-to-side difference above 0.2 mm is a warning sign. Then hold the blade under a light and look for a grind that sweeps evenly from heel to point. If you see a flat spot over 1 mm, a step in the taper, or a bevel that looks visibly steeper on one side, reject the sample. For first article approval, a profile projector helps, but on the line a go/no-go gauge is usually enough. The goal is not to make the knife look symmetrical in a photo; it is to stop the blade from steering in the hand.
Yes, absolutely. A good blade can be ruined by a bad tray or a loose blade guard. For paring knives, the tip is the first thing to suffer if the insert compresses during transport. Ask for a 1 m drop test on the retail carton, usually with three drops, before you approve shipment. If you see point damage after packing but before the carton leaves the factory, do not blame the grind first; check the tray depth, cavity shape, and how tightly the knife sits in the blister or sleeve. Packaging is part of quality control because your customer receives the box, not the naked blade from the grind room.
Send Your Paring Knife Spec Sheet for Review
We can review your tip tolerance, grind angle, edge finish limit, and packing method before sampling, so your next order ships with fewer returns and cleaner final inspection.
Request a Quote